 foxxcyber/docs
Creating an ATO Package
Create a package for a system boundary, fill in the SSP §3 system profile, and understand the authorization statuses and team-based access.
Everything in Bedrock RMF hangs off an ATO package — one package per authorization boundary. The package holds the system profile, the SCTM, POA&Ms, evidence, inventories, PPSM, cloud services, diagrams and the documentation matrix for that system, and it decides who can see them through team membership.
The Packages list
ATO Packages in the sidebar lists every package you can reach — "n packages — each represents an authorization boundary". The columns are Name (with the acronym in parentheses), Baseline, ATO Status, Implementations, POA&Ms, Evidence and Teams. Click a row to open the package Overview.
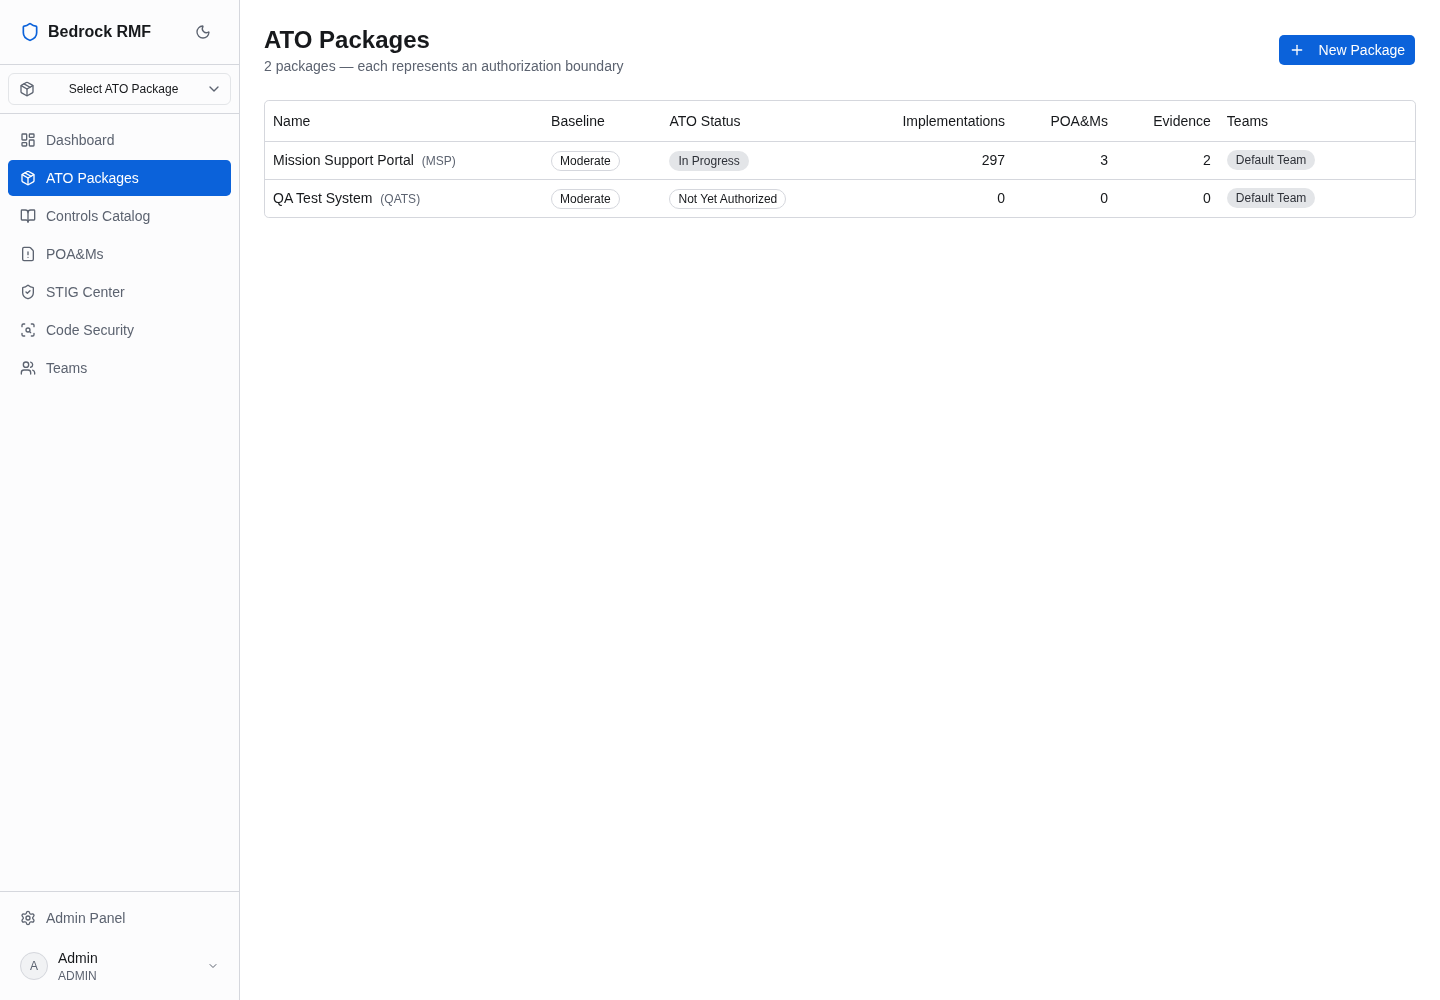
Implementations counts the controls the applied baseline placed into the SCTM — 297 for a Moderate package. A package whose SCTM has not had a template applied yet shows 0; see Control Implementations.
Creating a package
Click New Package (also available from the Dashboard as + New Package). The form asks for:
- Package Name * — the system name as it will appear on the SSP.
- Acronym — the short name shown as a badge in the package header.
- Description and Authorization Boundary — free text; both appear on the package Overview under Package Details.
- Teams — a multi-select combobox ("Select teams…"). Pick at least one; a fresh install only has Default Team. Team membership is how users get access to the package, so choose the team that owns the system.
- Baseline * — Low, Moderate or High, plus the individual Confidentiality, Integrity and Availability impact levels (Low / Moderate / High each).
Create Package stays disabled until name, team and baseline are set. New packages start as Not Yet Authorized.
The package Overview
Opening a package adds a package section to the sidebar — Overview ·
Profile · Catalog · Documentation · SCTM · POA&Ms · Evidence · HW/SW List ·
PPSM · Cloud Services · Diagrams · STIG · Activity — and the same items
appear as an icon tab strip under the package header. The header shows the
name, the acronym badge, the baseline badge (Moderate) and the
authorization status badge.
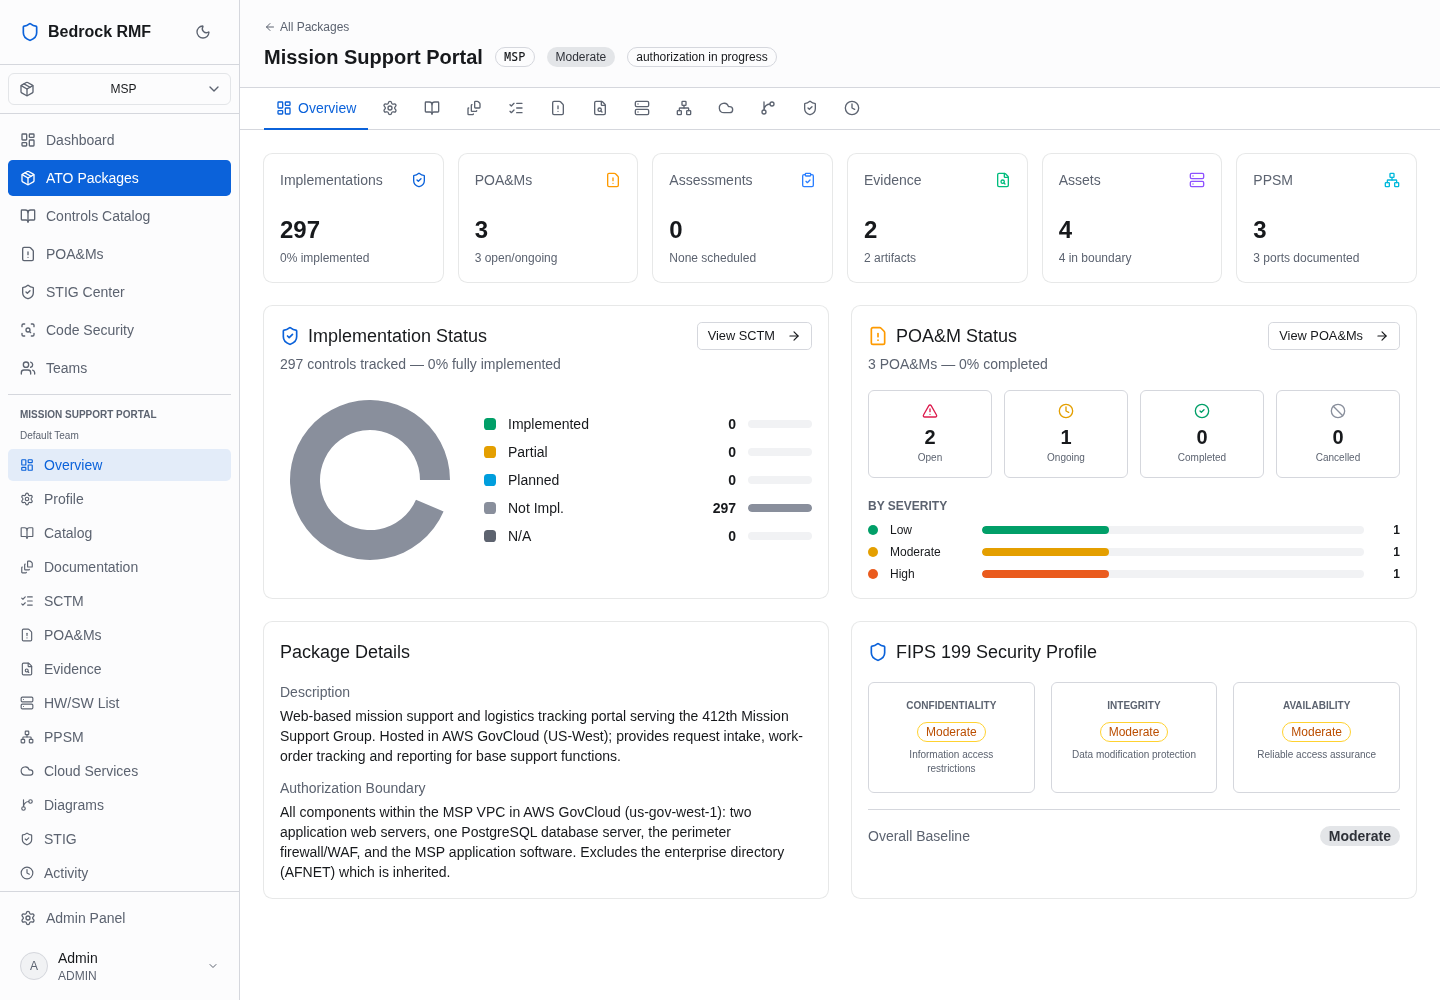
The Overview has cards for Implementations, POA&Ms, Assessments, Evidence, Assets and PPSM, each with a one-line status, and three panels: Implementation Status (→ View SCTM / Go to SCTM), POA&M Status (→ View POA&Ms / Create POA&M) and Package Details (Description, Authorization Boundary).
Switching packages
The Select ATO Package combobox under the logo switches the package section of the sidebar to another package without going back to the list.
The Profile — SSP §3 System Information
Profile is the system-information section of the SSP as a form. Fill it in early; the values feed the package header, the dashboard and the exports. Save Changes (top right) shows Saved after a successful save.
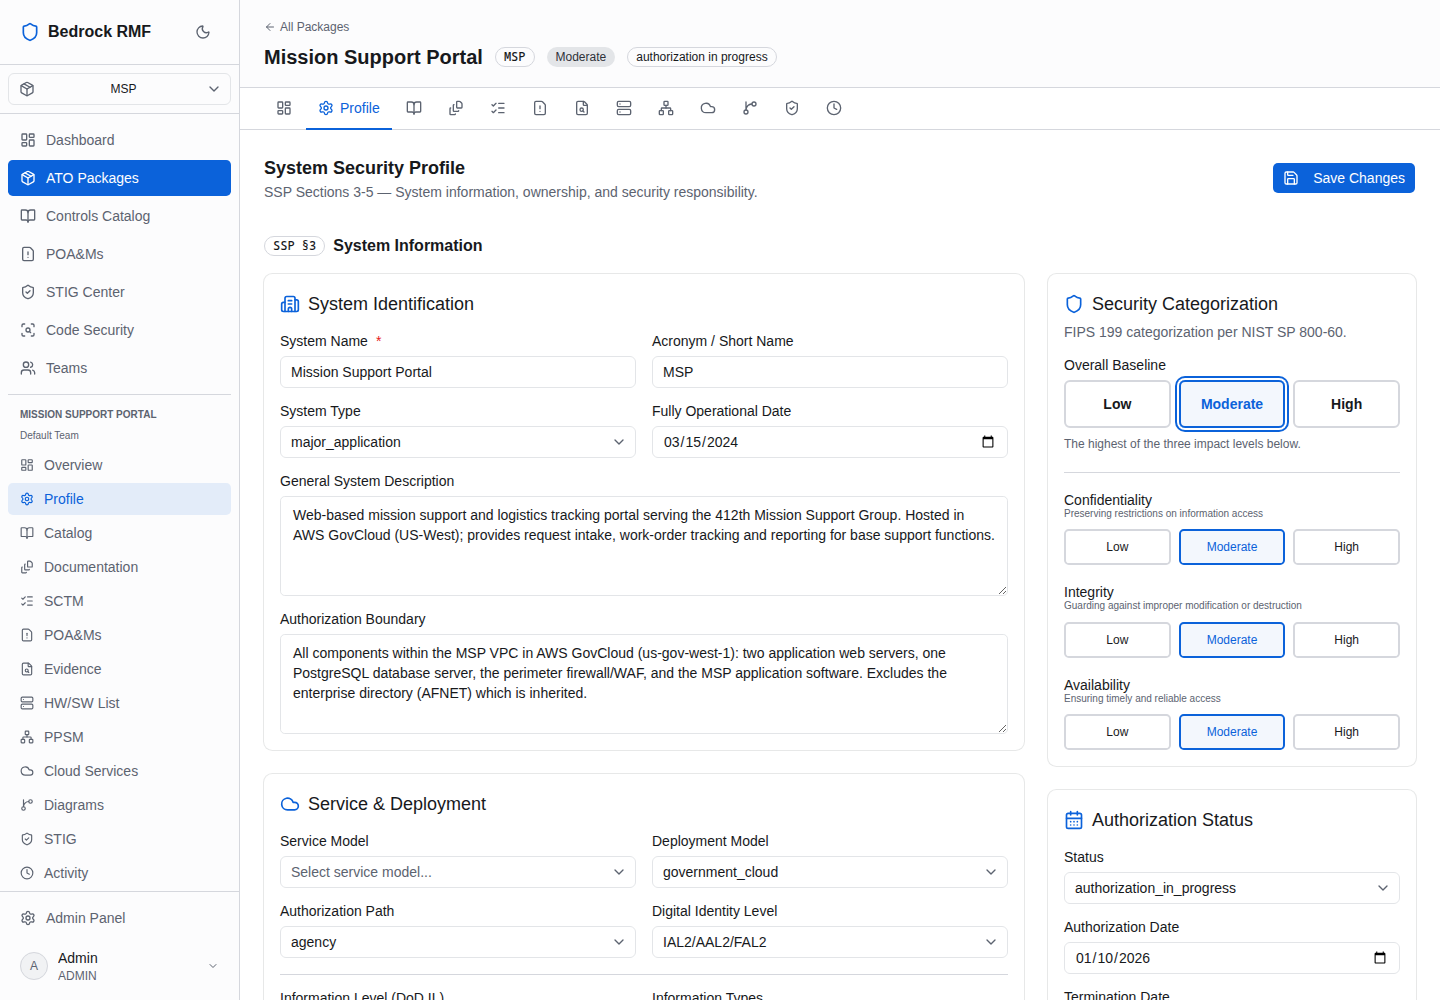
System Identification
- System Name *, Acronym / Short Name
- System Type — Major Application, General Support System or Minor Application
- Fully Operational Date
- General System Description and Authorization Boundary
Cloud / hosting
- Service Model — IaaS, PaaS, SaaS, IaaS/PaaS, IaaS/PaaS/SaaS, IaaS/SaaS, PaaS/SaaS, LI-SaaS or On-Premise
- Deployment Model — Public Cloud, Government-Only Community Cloud, Hybrid Cloud, Private Cloud or On-Premise
- Authorization Path — JAB Provisional Authorization (P-ATO), Agency Authorization (ATO), DISA Authorization or Internal Authorization
- Digital Identity Level (DIL) — Level 1 (IAL1/AAL1/FAL1) through Level 3 (IAL3/AAL3/FAL3)
- Information Level (DoD IL) — IL2, IL4, IL5, IL4/IL5 or IL6
- Information Types — free text, per NIST SP 800-60 Vol II, comma-separated
Impact levels — the C / I / A Low-Moderate-High buttons and the overall baseline, the same values you set at creation.
Authorization Status
- Status — Not Yet Authorized, Authorization In Progress, Authorized, Denied or Revoked. This is the badge in the package header and the ATO Status column; the Dashboard's Authorization Status donut and the Admin packages page roll it up across the workspace.
- Authorization Date and the expiration date.
System Owner Point of Contact and ISSO Point of Contact — Full name, Title, Company / Organization, City State Zip, Phone, Email for each.
Package admin — a combobox of users.
Three unlabelled date inputs
The three date fields carry no visible labels for screen readers. In order they are Fully Operational Date, Authorization Date and the expiration date. Dates are entered as YYYY-MM-DD and rendered in US format.
Fixed in 1.0.1
On 1.0.0, rendered dates came out one day earlier than entered in US time zones (issue #3). Upgrade to 1.0.1 or later.
Who can see a package
A package belongs to one or more teams (the Teams column). A user sees a package only if they belong to one of its teams, and what they can do inside it is set by their role — see First Login and Roles. Admins manage package-team assignments under Admin → ATO Packages.
Every write to a package is recorded in the package Activity tab and in Admin → Audit Log.