 foxxcyber/docs
Managing clients
The client roster, self-signup approvals, and giving a client their own account.
Personal-training clients live under Clients in the sidebar. Every client belongs to you alone — no other coach can see them.
The client list
The header shows the total count and an Add Client button.
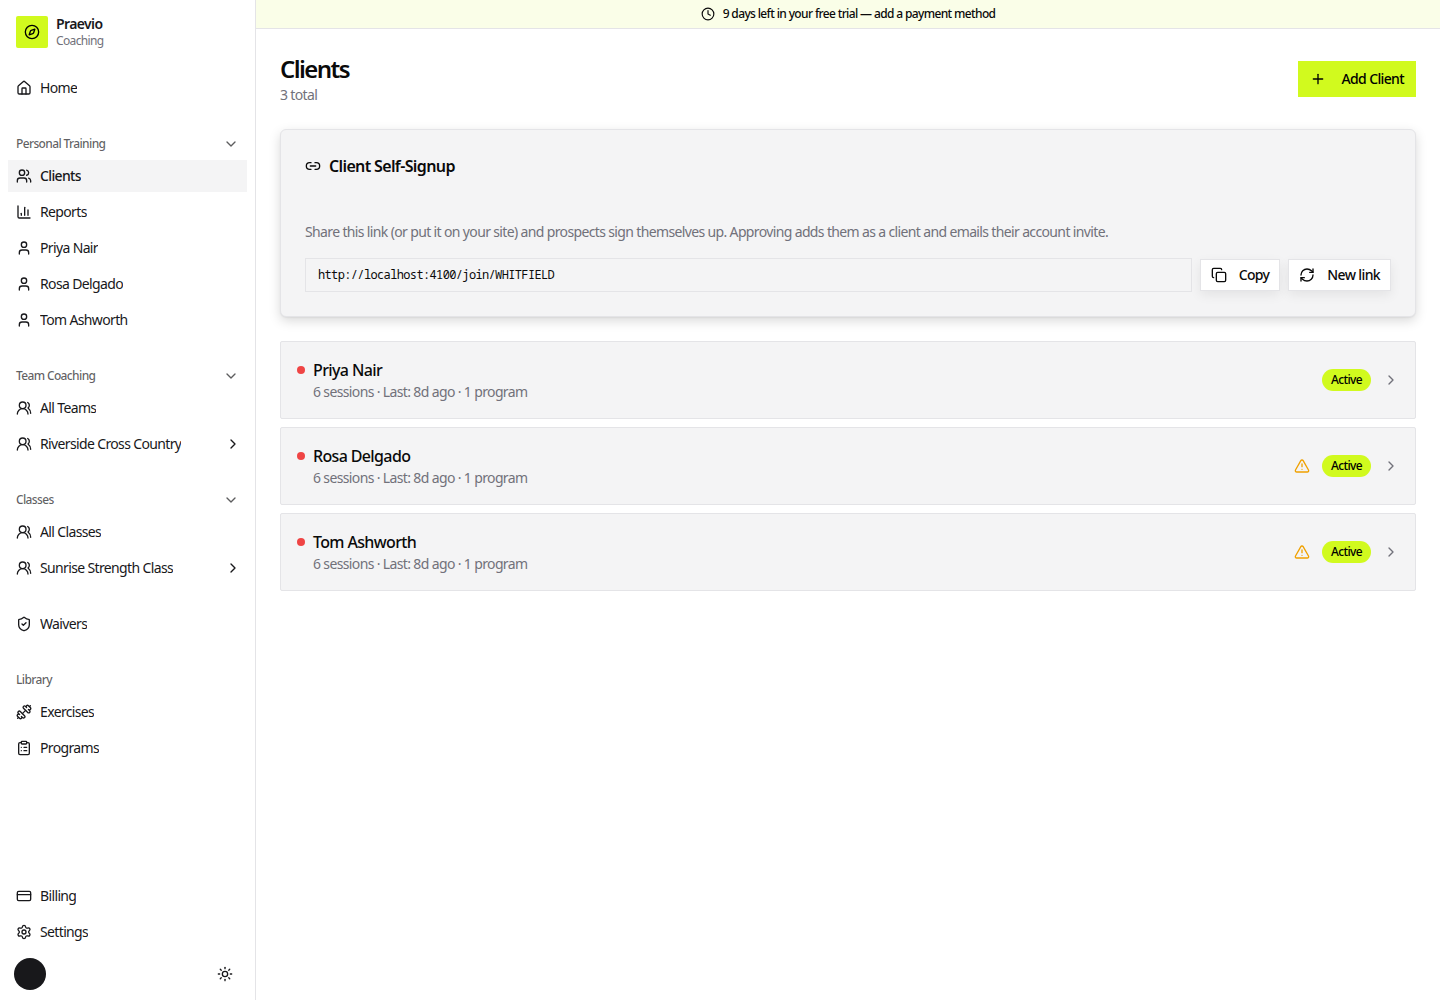
Each row is a client:
- A coloured dot to the left of the name summarises recent activity — green for three or more sessions this week, amber for some activity, red for none.
- The line underneath gives lifetime session count, when the last session
was (Today, Yesterday, or
Nd ago), how many sessions happened this week, and how many programs are assigned. - A warning triangle on the right appears whenever the client has anything recorded in their health-conditions field, so you see it before you open the record.
- An Active or Inactive badge closes out the row.
Client Self-Signup
Above the list sits the Client Self-Signup card. It holds a shareable link you can post on your website or send to a prospect. Copy puts it on your clipboard; New link rotates it, which immediately invalidates the old one.
When someone signs themselves up, they appear under Signups awaiting approval with their name, email, and phone. Approve creates the client record and emails them their account invite. The dismiss control (the ✕) removes the request without creating anything. Nothing a prospect submits reaches your roster until you approve it.
The client record
Opening a client shows a header card with their name, email, and phone, plus a callout box for health conditions when any are recorded.
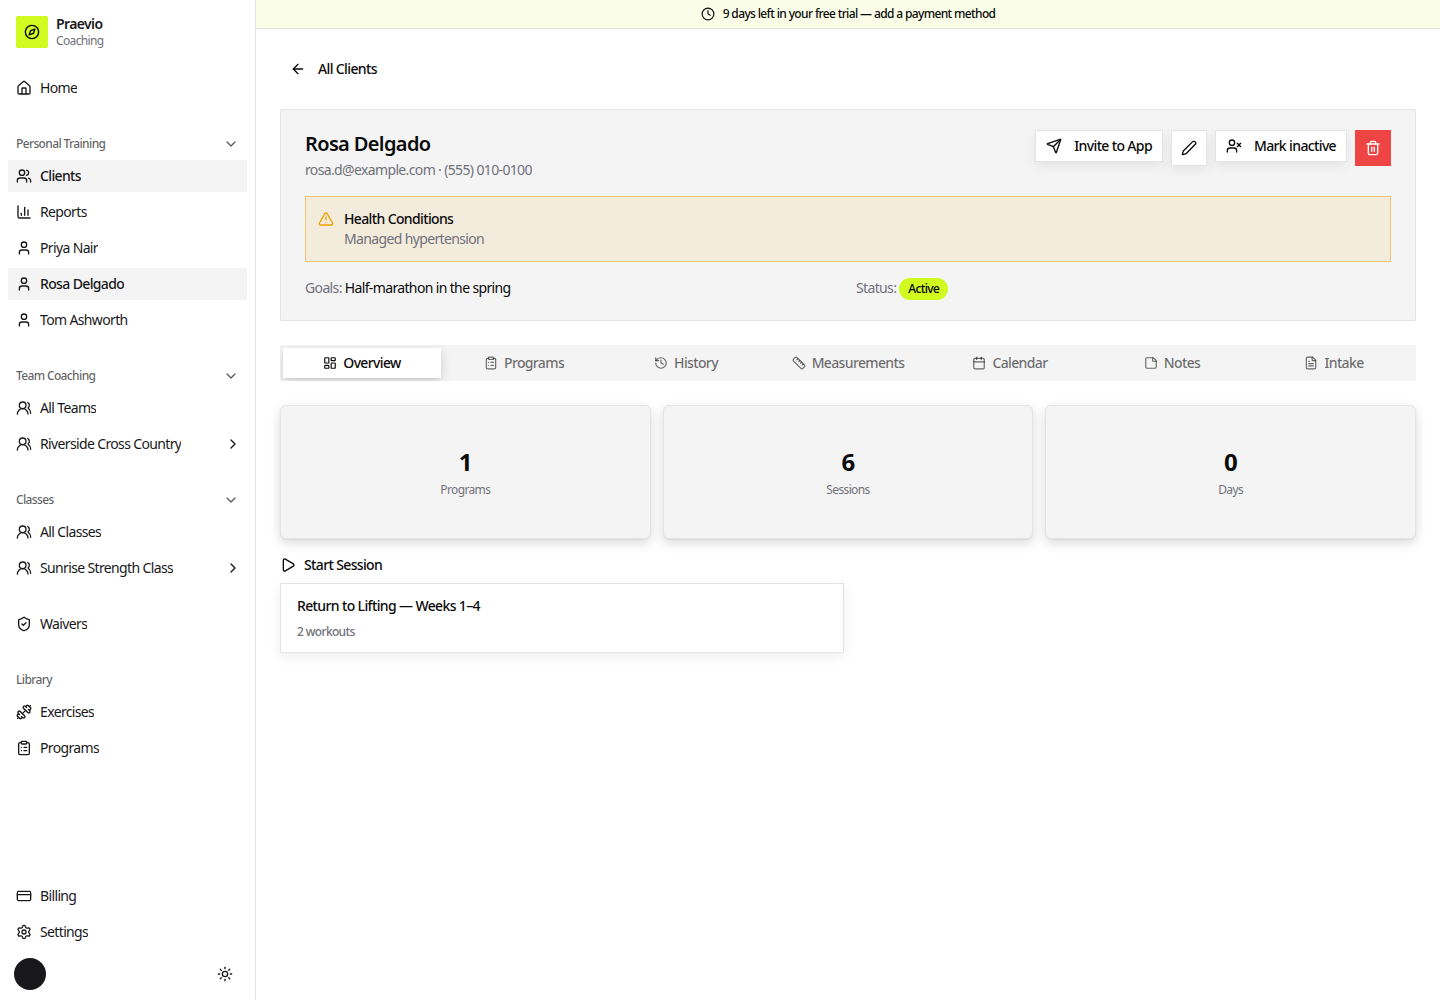
Below that is a row of tabs:
| Tab | What it holds |
|---|---|
| Overview | Session, program, and day-count stats, plus Start Session for each assigned program |
| Programs | Assigned programs, and the control to remove an assignment |
| History | Past session logs |
| Measurements | Body measurements and their trends |
| Calendar | Session dates in calendar form |
| Notes | Your private notes, which can be pinned |
| Intake | The submitted intake response |
See Assigning programs, Measurements & progress, and Client intake for those tabs in detail.
Header actions
- Invite to app — sends the client an account invitation. The button is disabled with an explanatory label until the prerequisites are met: it reads Add an email to invite when the client has no email address, and Add a waiver first until you have published at least one waiver document. Once sent, it becomes Resend invite; once the client has set their password, it becomes Account active and stops being clickable.
- The pencil icon opens the edit dialog.
- Mark inactive takes the client off your active roster. A confirmation spells out what happens: every session, note, and measurement is kept, and they can be brought back at any time with Reactivate. If they were your last active client, your personal-training charge stops — see Billing & plans.
- The trash icon deletes the client permanently.
Marking a client inactive is reversible and keeps their history. Deleting is not.
What the client sees
Once the invitation is accepted and intake is submitted, the client signs in to their own two-tab app. Dashboard lists their assigned programs with a Start button per workout, a private message thread with you, and any notes you have pinned. Progress shows their measurement trends, strength progress per exercise, and a full history of logged sessions.
Publishing a waiver is a prerequisite for inviting anyone — see Waiver documents.