 foxxcyber/docs
Organization and branding
Set your organization's name, address, logo and colours, its own sign-in page, whether it is a business or a nonprofit, the workspace welcome, and announcements.
Four screens decide who your organization is and how Foxx HQ looks to your people and the public:
- Organization profile: names, address, logo, accent colour and your own sign-in page.
- Workspace settings: business or nonprofit, the welcome message, and the default workspace.
- Announcements: a banner everyone sees for a while.
- Organization: your subsidiaries, if you have any.
Before you start
- You must be a company administrator.
- For a logo: a PNG, JPEG or WebP file up to 1 MiB and 2048 pixels on its longest side. A wide wordmark on a transparent background works best.
- For a sign-in background image: PNG, JPEG or WebP up to 3 MiB and 4096 pixels on its longest side.
Set the organization profile
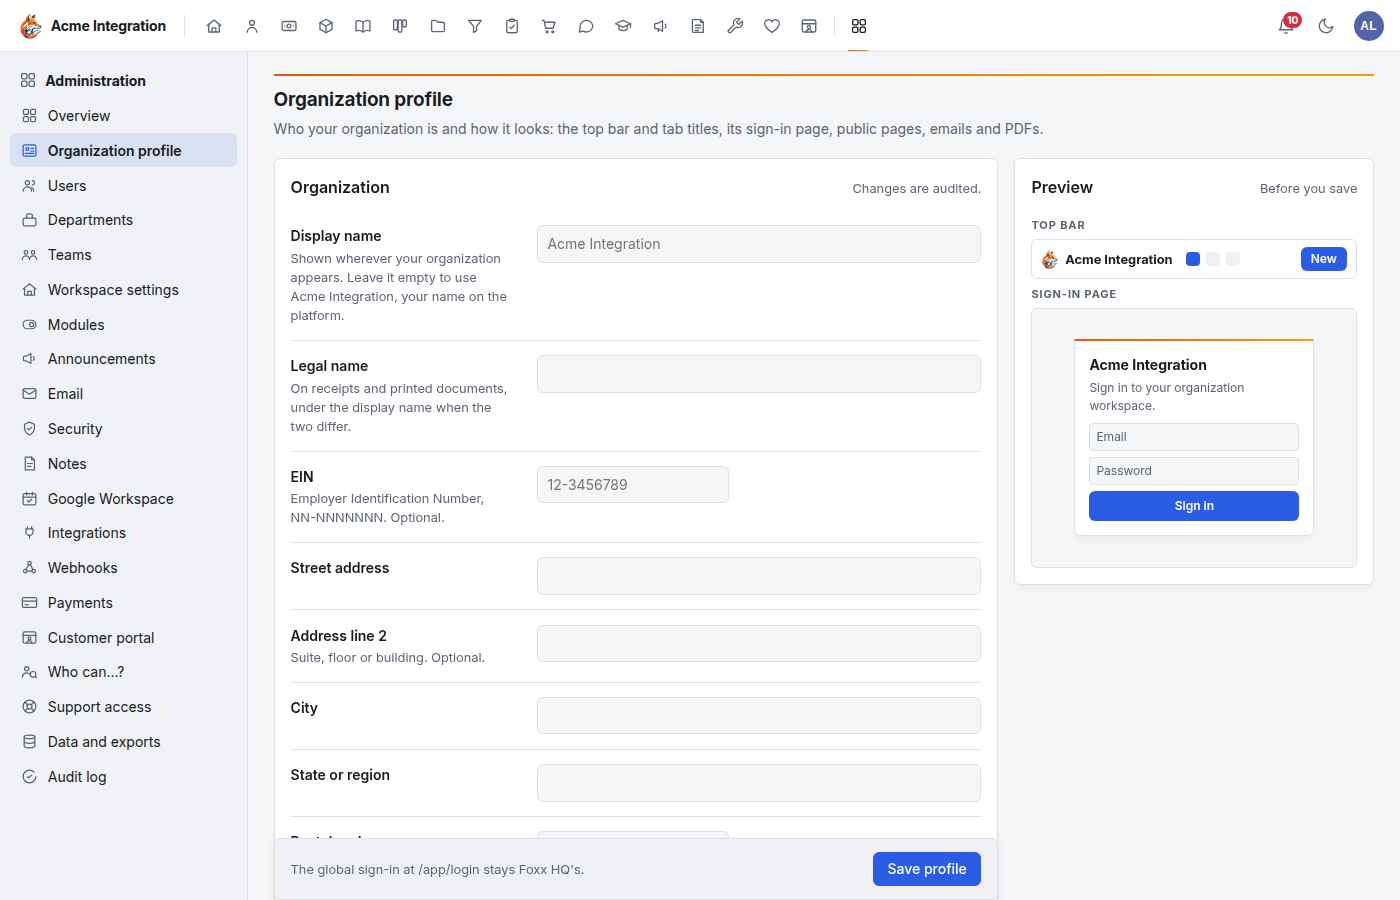
- Open Administration → Organization profile.
- Fill in the Organization card:
- Display name: shown wherever your organization appears: the top bar, browser tabs, your sign-in page, public pages (web forms, newsletter pages, support and maintenance report pages), emails and PDFs. Leave it empty to use your name on the platform.
- Legal name: on receipts and printed documents, under the display name when the two differ.
- EIN: your Employer Identification Number, written NN-NNNNNNN. Optional.
- Street address, Address line 2, City, State or region, Postal code, Country: printed on documents and in email footers.
- Phone and Website (an
https://address): in email footers. - Time zone: where the organization keeps its hours, for example
America/New_York. Start typing to pick from the list.
- Fill in the Branding card (see below) and the Sign-in page card if you want them.
- Watch the Preview on the right. It shows the top bar and the sign-in page as they will look.
- Click Save profile. Every change is recorded in the audit log.
Logo and accent colour
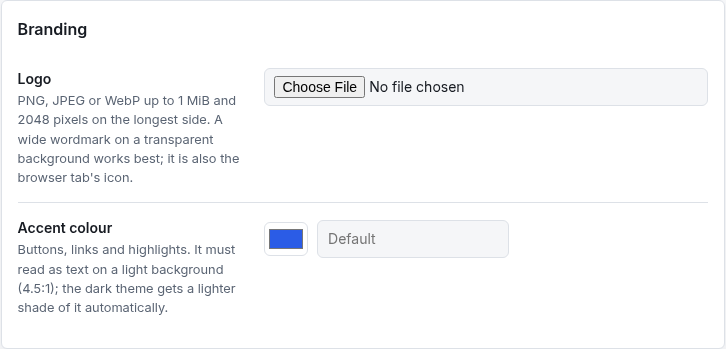
- Logo: choose a file. It replaces the fox in the top bar and becomes the browser tab's icon. To go back to the fox, tick Remove the current logo and save.
- Accent colour: the colour of buttons, links and highlights. Pick
it with the swatch or type a hex code such as
#1d4ed8. It must be dark enough to read as text on a white page (a contrast of 4.5:1); a colour that is too light is refused when you save. The dark theme gets a lighter shade of it automatically. Use the default puts the standard colour back.
Your own sign-in page
Your organization has its own sign-in page at its own address (ending
in /app/login after your organization's part of the address). These
fields change only that page. The general Foxx HQ sign-in page stays as
it is.
- Headline: above the form. Empty shows your display name.
- Welcome message: plain text, up to 1,000 characters. Leave a blank line between paragraphs. Web and email addresses become links.
- Background: The app's, A colour (pick one), or An image (upload one).
- Help contact: an email address or phone number shown under the form for people who can't sign in.
Choose business or nonprofit
The organization type decides whether the nonprofit features are offered.
- Open Administration → Workspace settings.
- Under Organization type, choose A business or A nonprofit.
- Click Save type.
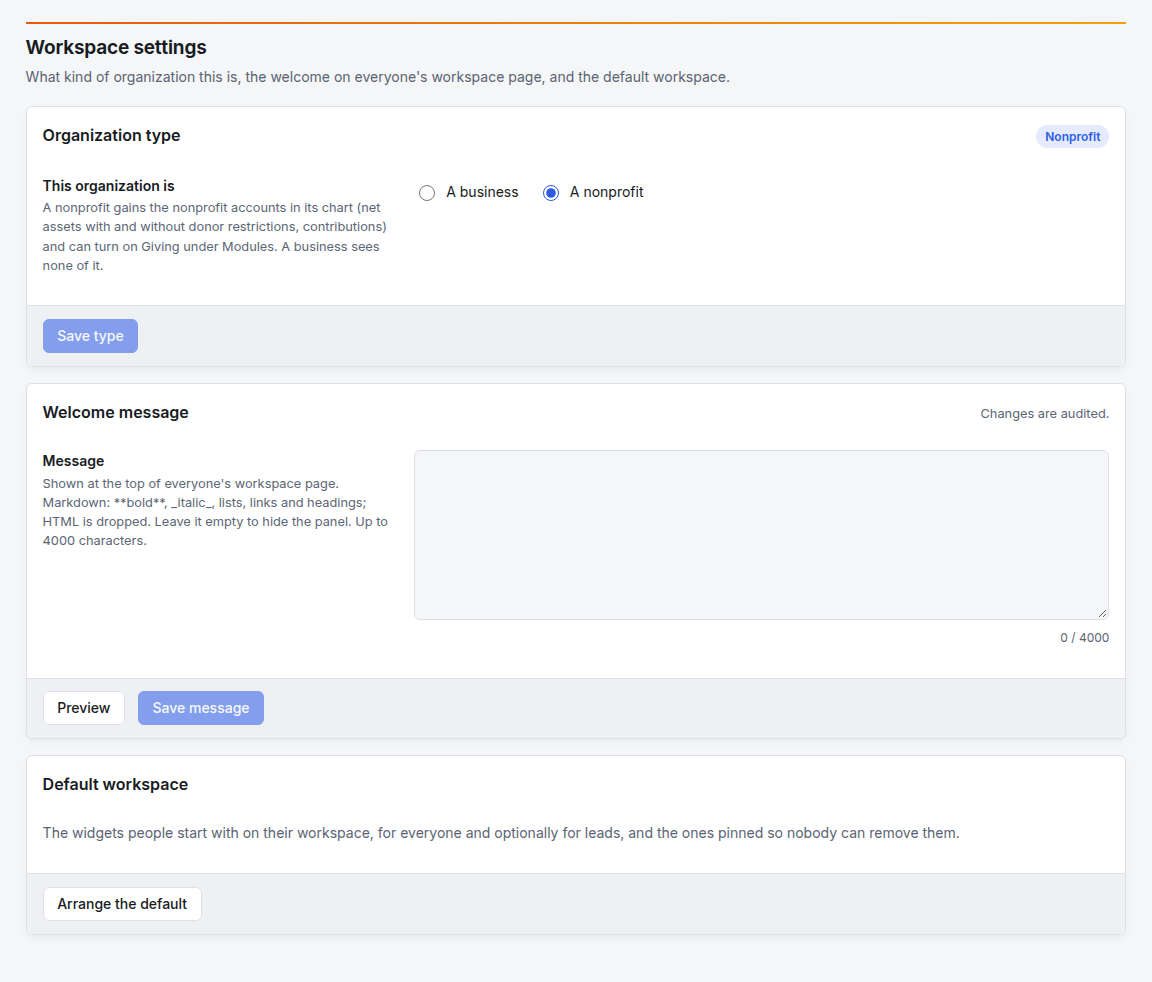
What choosing nonprofit changes:
- Your chart of accounts gains the nonprofit accounts it lacks: Investments, Net assets without donor restrictions, Net assets with donor restrictions, Contributions without donor restrictions, Contributions with donor restrictions, In-kind contributions, Net assets released from restriction, and Donated goods and services. Accounts you already have are left alone.
- Giving (donations, funds, campaigns and donor receipts) appears under Modules. It starts off: turn it on there when you are ready.
- The Overview shows a Nonprofit badge.
A business sees none of this. Switching a nonprofit back to a business removes nothing from the chart of accounts, but Giving is no longer offered.
Setting up donations takes these steps in this order: choose A nonprofit here; under Modules check that Finance is on and turn Giving on; then connect Stripe or PayPal under Payments setup. The Giving setup checklist walks through the donation page itself.
Write the welcome message
The welcome message is a panel at the top of everyone's workspace page.
- In Administration → Workspace settings, type the message under
Welcome message. You can use Markdown:
**bold**,_italic_, lists, links and headings. HTML is dropped. Up to 4,000 characters. - Click Preview to see it as people will. Click Edit to go back.
- Click Save message.
To hide the panel, empty the box and save.
Default workspace → Arrange the default opens the layout new people start with: the widgets for everyone, optionally a different set for leads, and the ones pinned so nobody can remove them. See Workspace home for how people use their workspace.
Post an announcement
An announcement is a banner at the top of every page, for everyone in the organization, between its start and end times.
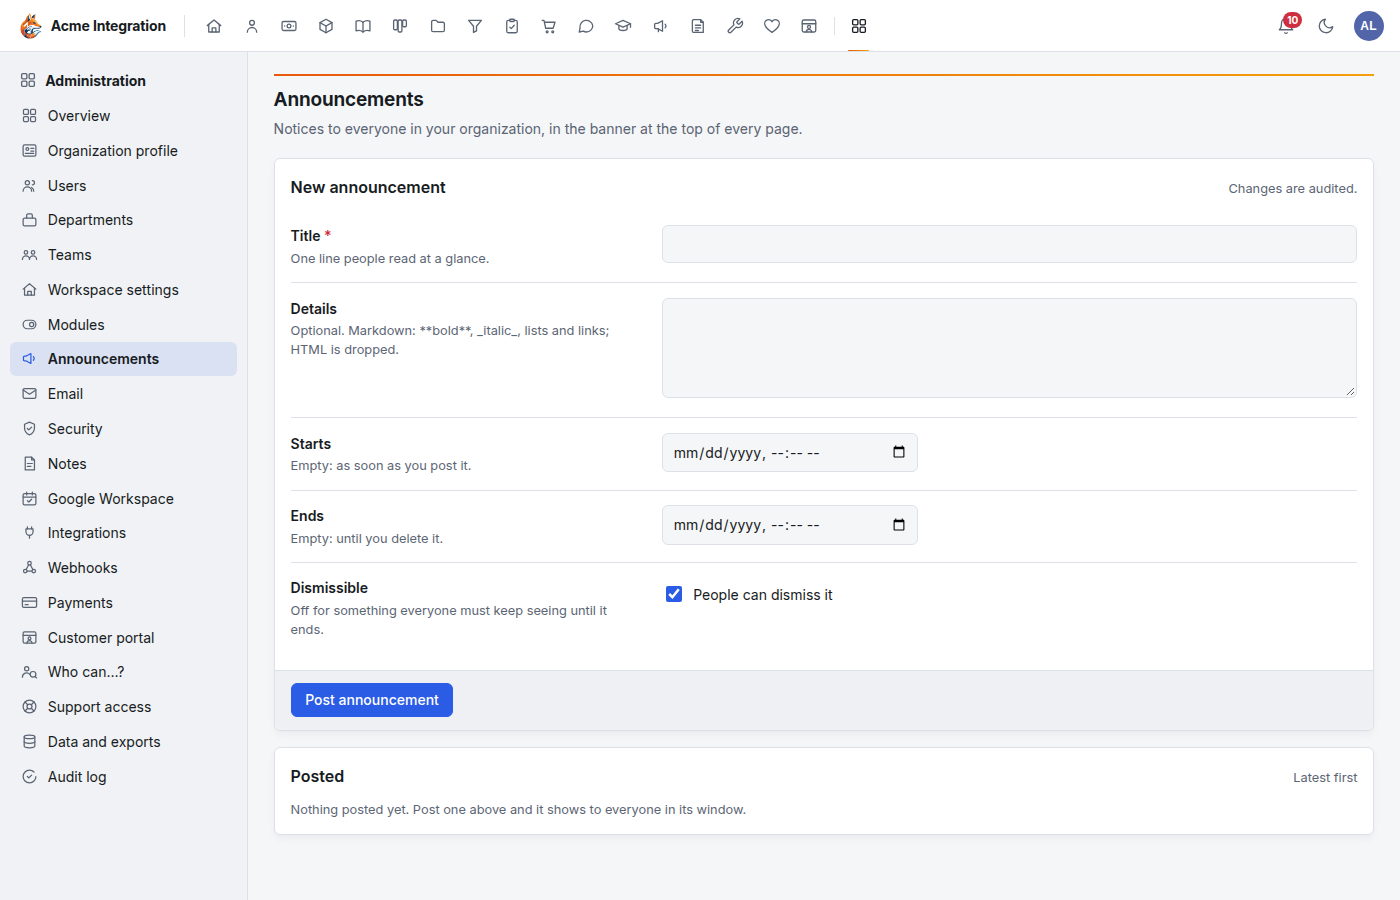
- Open Administration → Announcements.
- Fill in New announcement:
- Title: one line people read at a glance.
- Details: optional. Markdown: bold, italic, lists and links.
- Starts: empty means as soon as you post it.
- Ends: empty means until you delete it.
- Dismissible: turn it off for something everyone must keep seeing until it ends.
- Click Post announcement. It appears under Posted, where you can edit or delete it.
Subsidiaries (Organization)
Administration → Organization appears only when your organization has subsidiaries. It lists them with their status and how many administrators and members each has. Sync admins into subsidiaries copies your current company administrators into each subsidiary; accounts already there are left untouched. Enter opens a subsidiary's workspace.
Troubleshooting
"Fix the highlighted fields" when saving the profile. Usually the
accent colour is too light, the EIN is not in NN-NNNNNNN form, or the
website does not start with https://. The field says which.
The logo upload is refused. Check the type (PNG, JPEG or WebP), the size (1 MiB at most) and the dimensions (2048 pixels at most on the longest side).
I chose nonprofit but Giving isn't in the menus. Giving starts off. Turn it on under Modules, then give people the Giving grants (see Access and permissions).
The general sign-in page doesn't show my logo. By design: only your organization's own sign-in page carries your branding.
I don't see Organization in the sidebar. Your organization has no subsidiaries. The platform operator sets those up.