 foxxcyber/docs
Payments setup (Stripe and PayPal)
Connect your organization's own Stripe and PayPal accounts step by step, add their webhooks so payments reach your books, test the connection, and handle events Foxx HQ couldn't match.
Foxx HQ takes payments through your organization's own Stripe and PayPal accounts. Payers pay on Stripe's or PayPal's own pages, so card and bank details never reach Foxx HQ. What happened comes back to Foxx HQ through a webhook, and is recorded in Finance and the general ledger.
Connect either or both. Pay links on invoices and a nonprofit's donation page work with whichever is connected, and offer both when both are. The catalog and subscriptions are Stripe's only.
Before you start
- You must be a company administrator. Connecting payments is never delegated: no grant reaches it.
- The Finance module must be on (Administration → Modules). While Finance is off, Payments is missing from the Administration sidebar and the page answers "not found".
- For Stripe: a Stripe account, and access to its dashboard to copy API keys and add a webhook.
- For PayPal: a PayPal business account, and access to the PayPal developer dashboard to create a REST app and add a webhook.
- For donations: the organization type must be nonprofit and Giving must be on. See Organization and branding and Modules.
- Start in test mode (Stripe) or sandbox (PayPal). They move no real money.
A connection without its webhook looks fine but is only half done: payers can pay, but Foxx HQ never hears about it, so invoices stay unpaid and gifts are not recorded. Always finish the webhook step and paste its secret (Stripe) or ID (PayPal).
Connect Stripe
Open Administration → Payments. The Stripe card is at the top.
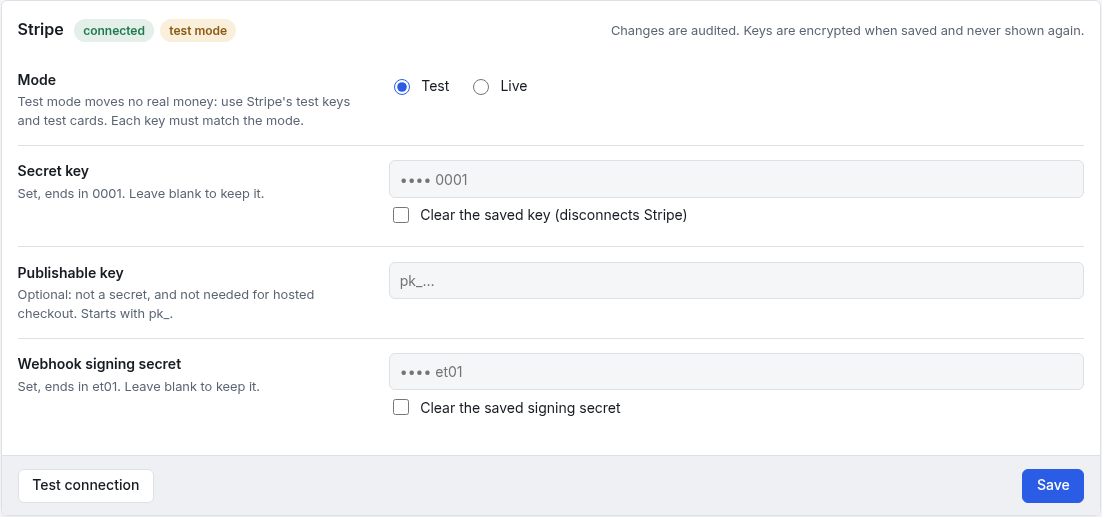
- Under Mode, choose Test (or Live when you are ready for real money). Each key must match the mode: a live key can't be saved in test mode.
- In the Stripe dashboard, copy your secret key from the API keys
page. It starts with
sk_test_orsk_live_(orrk_for a restricted key). Paste it into Secret key. - Publishable key is optional. Foxx HQ doesn't need it for Stripe's
hosted checkout. It starts with
pk_. - Leave Webhook signing secret empty for now.
- Click Save.
- Click Test connection. Foxx HQ reads your Stripe account (changing nothing) and shows which account the key opens, under Last test.
Add the Stripe webhook
The Webhook card under the Stripe card shows the two things Stripe needs: the Endpoint URL and the Events to send.
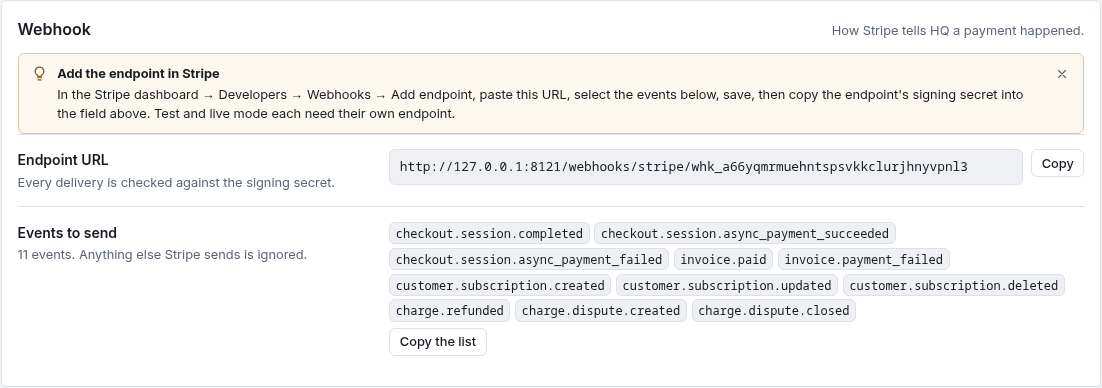
- Click Copy beside Endpoint URL. It is your organization's own
address, ending in
/webhooks/stripe/followed by a long code. - In the Stripe dashboard, add a webhook endpoint (Stripe calls it an event destination) for your account, with that URL.
- Select exactly the events Foxx HQ lists. Copy the list copies
them. They are:
checkout.session.completed,checkout.session.async_payment_succeeded,checkout.session.async_payment_failed,invoice.paid,invoice.payment_failed,customer.subscription.created,customer.subscription.updated,customer.subscription.deleted,charge.refunded,charge.dispute.createdandcharge.dispute.closed. - Save it in Stripe, then reveal the endpoint's signing secret (it
starts with
whsec_) and copy it. - Back in Foxx HQ, paste it into Webhook signing secret on the Stripe card and click Save.
Stripe's own guide to adding an endpoint is Receive Stripe events in your webhook endpoint. At the time of writing, Stripe's dashboard does this from the Webhooks tab in Workbench: Create an event destination, choose Your account, choose the Snapshot payload format (the events above are snapshot events), select the events, choose Webhook endpoint, enter the Endpoint URL, and then Reveal secret on the endpoint's page.
Test mode and live mode have separate endpoints and separate signing secrets in Stripe. When you go live, add the live endpoint too.
Move Stripe to live
- Choose Live under Mode.
- Paste your live secret key (
sk_live_…). - Add the live webhook endpoint in Stripe (same URL and events) and paste its signing secret.
- Save, then Test connection.
Connect PayPal
The PayPal card is under Stripe's.
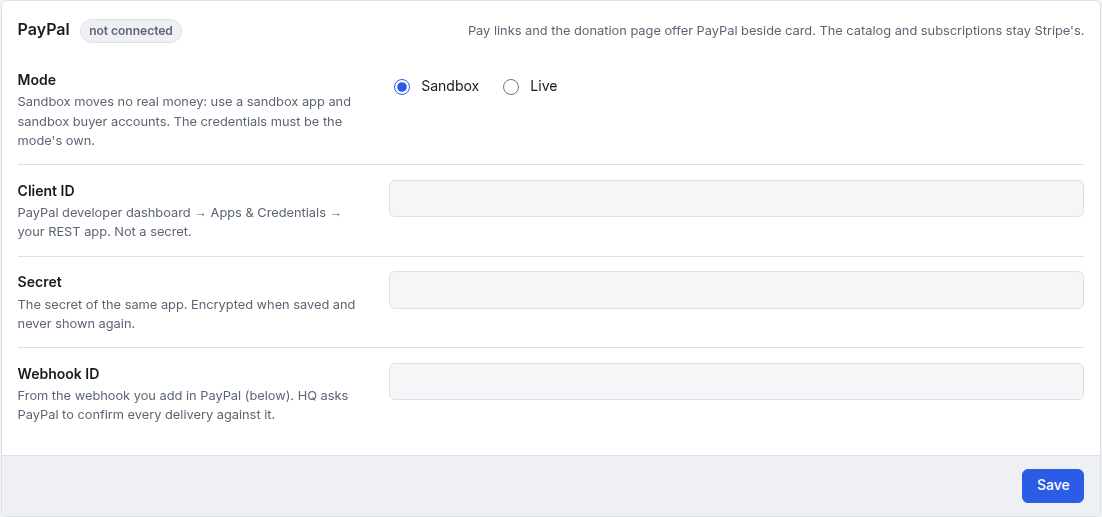
- In the PayPal developer dashboard, under Apps & Credentials, create a REST app for your business account. Start with a Sandbox app.
- In Foxx HQ, under Mode, choose Sandbox or Live to match the app.
- Paste the app's Client ID and Secret.
- Click Save, then Test connection. Foxx HQ asks PayPal for an access token (changing nothing) and shows which app the credentials open. If PayPal refuses them, check they belong to an app in the mode you chose.
Add the PayPal webhook
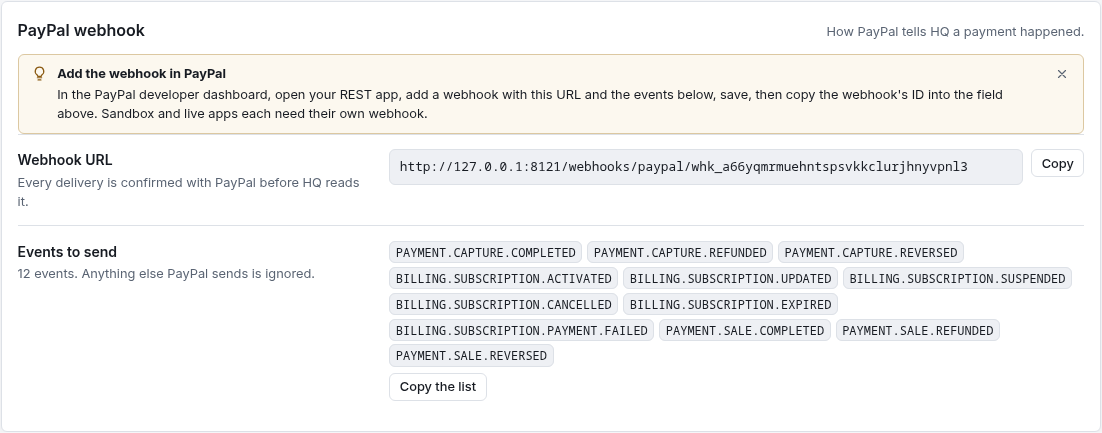
- Click Copy beside Webhook URL in the PayPal webhook card.
It ends in
/webhooks/paypal/followed by a long code. - In the PayPal developer dashboard, open your REST app's settings and add a webhook with that URL.
- Subscribe it to the events Foxx HQ lists (Copy the list):
PAYMENT.CAPTURE.COMPLETED,PAYMENT.CAPTURE.REFUNDED,PAYMENT.CAPTURE.REVERSED,BILLING.SUBSCRIPTION.ACTIVATED,BILLING.SUBSCRIPTION.UPDATED,BILLING.SUBSCRIPTION.SUSPENDED,BILLING.SUBSCRIPTION.CANCELLED,BILLING.SUBSCRIPTION.EXPIRED,BILLING.SUBSCRIPTION.PAYMENT.FAILED,PAYMENT.SALE.COMPLETED,PAYMENT.SALE.REFUNDEDandPAYMENT.SALE.REVERSED. - Save it, then copy the webhook's Webhook ID from PayPal.
- Back in Foxx HQ, paste it into Webhook ID on the PayPal card and click Save.
PayPal's guide is Integrate webhooks. Subscribing a URL in the app's settings creates the Webhook ID; it is shown where the URL's events are set.
Before reading any delivery, Foxx HQ asks PayPal to confirm its signature for that Webhook ID, so nobody else can post payments into your books. Sandbox and live apps have separate webhooks and separate Webhook IDs.
Move PayPal to live
Create (or switch to) the live app's credentials, choose Live, paste the live Client ID and Secret, add the live webhook in PayPal, paste its Webhook ID, then Save and Test connection.
What is stored, and what isn't
- Never stored: card numbers or bank details. Payers type them into Stripe's or PayPal's pages, never Foxx HQ's.
- Encrypted, never shown again: Stripe's secret key and signing secret, and PayPal's secret. The card says only Set, ends in 1234. Leave a field blank to keep what is saved, or tick Clear the saved key / Clear the saved secret, which disconnects that provider. Secrets never appear in the audit log.
- Shown: PayPal's Client ID and Webhook ID. They are identifiers, not secrets.
Events Foxx HQ couldn't match
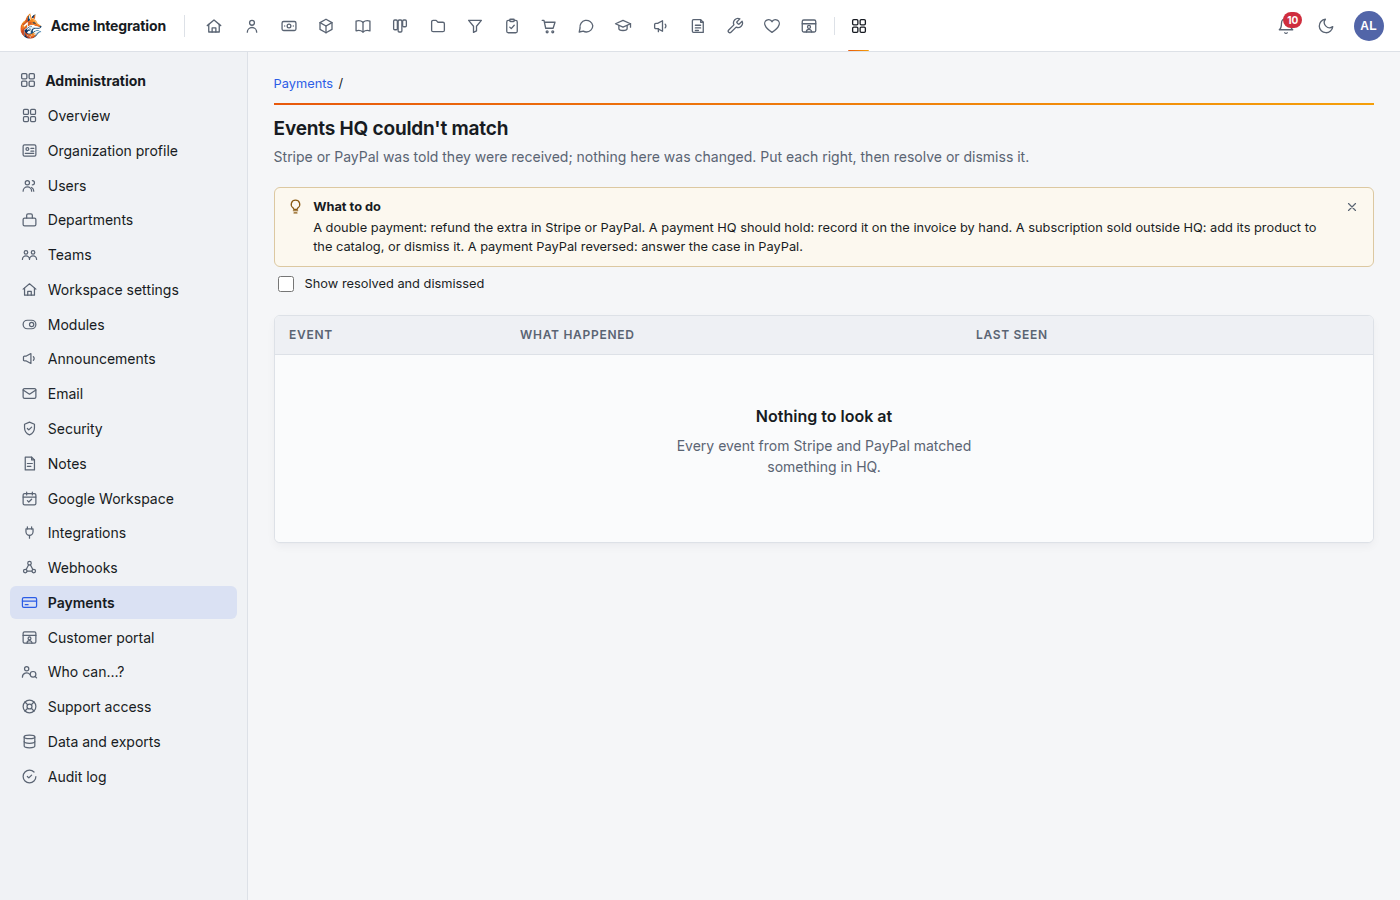
Some payments have nothing in Foxx HQ to attach to: a second payment on an invoice already paid, a subscription sold outside Foxx HQ's catalog, a refund on a payment Foxx HQ never recorded, a payment PayPal reversed. Foxx HQ acknowledges them to Stripe or PayPal and lists them, and company administrators get a notification. The Overview's health card counts them too.
- On Administration → Payments, click Review events (a red number shows how many are open).
- For each event, fix what needs fixing in Stripe or PayPal (for example refund a double payment), or record a payment by hand.
- Open the row menu and choose Resolve… (say what you did) or Dismiss… when there is nothing to do.
Show resolved and dismissed shows the ones already handled.
After connecting
- Invoices: a sent invoice with a balance gets Pay online, and emailed invoices carry a Pay online button. See Invoices and billing.
- Catalog, Subscriptions, Online payments (Stripe only) appear under Finance for the people who run Finance.
- Donations: set up the donation page. See Donation page.
Troubleshooting
Payments is missing from the Administration sidebar. Finance is off. Turn it on under Administration → Modules and reload.
"That is a live key. Enter your test secret key, or switch to live mode" (or the reverse). The key and the Mode don't match. Switch the mode, or paste the other key. Switching mode with only the old key saved gives "The saved key is a test key…": paste the new mode's key in the same save.
A red banner says the encryption key is not set. The server can't store secrets yet. Ask the platform operator to set it.
Test connection fails. Stripe: check the key is current and matches the mode. PayPal: check the Client ID and Secret come from the same app, in the mode you chose.
Payments go through but invoices stay unpaid, or gifts don't appear. The webhook is missing or wrong. Check that the provider's webhook uses the URL shown in Foxx HQ, that every listed event is selected, and that the signing secret (Stripe) or Webhook ID (PayPal) in Foxx HQ belongs to that webhook in the same mode. Test and live each need their own.
Stripe shows failed deliveries to the endpoint. A wrong or old signing secret is the usual cause: reveal it again in Stripe, paste it, and Save.
Online payments, Catalog or Subscriptions are missing under Finance. They appear once Stripe is connected, and only for people who run Finance.
PayPal isn't offered for the catalog or subscriptions. By design: those are Stripe's only for now.