 foxxcyber/docs
Document Library and files
Create shared libraries, upload and organize files, write documents and spreadsheets in the browser, keep versions, ask for reviews, and use your private My Drive.
The Document Library holds your organization's files: shared libraries with folders, tags and version history, plus a private My Drive for everyone. You can also write Word-style documents and spreadsheets right in the browser.
Before you start
- Document Library must be on under Administration → Modules. Once it is on, everyone can use it and everyone has a My Drive.
- Each library is owned by the company, a department or a
team:
- Members of the owning unit add and edit documents with no extra setup. Its leads (or a team's managers) administer it.
- An Organization library can be read by everyone. A Private library is invisible to anyone not granted access.
- A read grant really is read-only: no uploads, renames or deletes.
- Who can create libraries: company administrators, department leads and team managers.
- Each upload can be up to the size shown on the upload area (10 MB on a standard setup).
Create a library
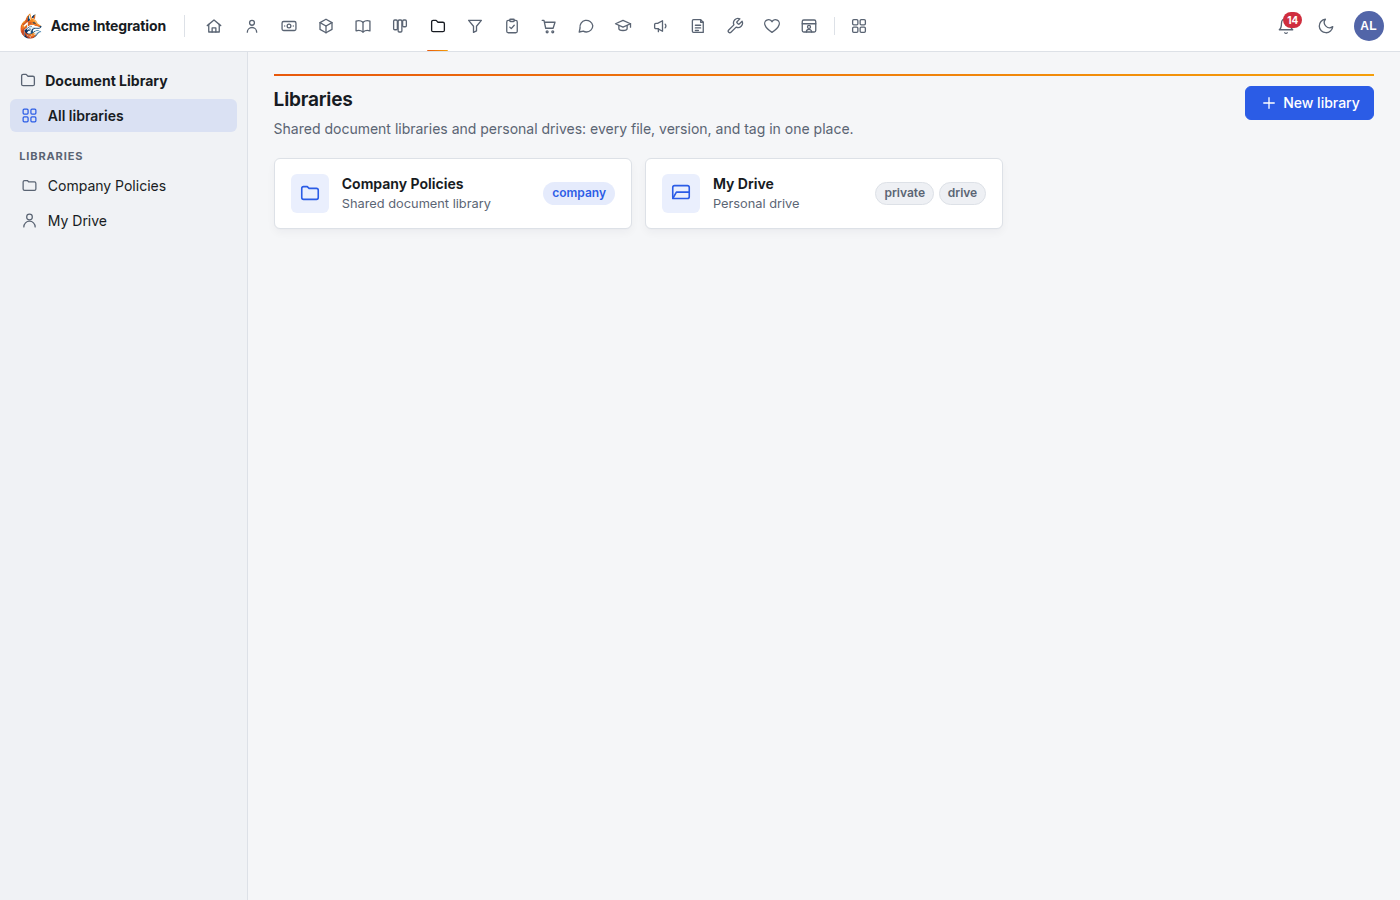
- Open Document Library. Libraries lists every library you can open, and your My Drive.
- Click New library.
- Enter a Name, choose the Owner, and choose Visibility: Organization (everyone can read) or Private (only the owner and the people or units you invite).
- Click Create library.
Add files
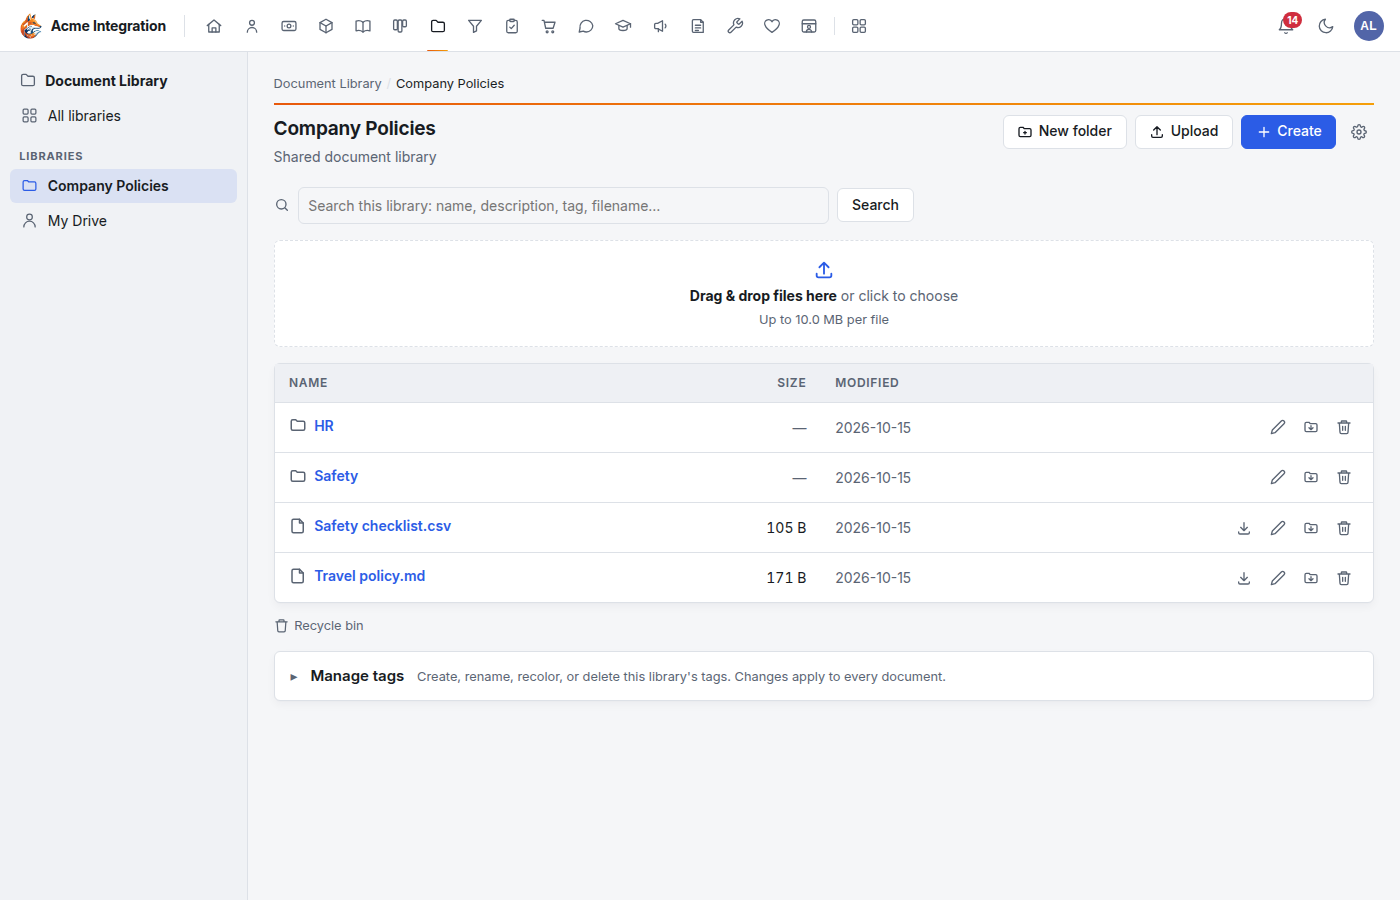
- Upload: drag files onto the dashed area (Drag & drop files here), or click it, or click Upload.
- New folder: enter the New folder name and click Create folder.
- Create: write a new file in the browser (see below), or upload one with a name and description.
Uploading a file with the same name as an existing one adds a new version of it; the old versions stay downloadable.
Write a document or spreadsheet in the browser
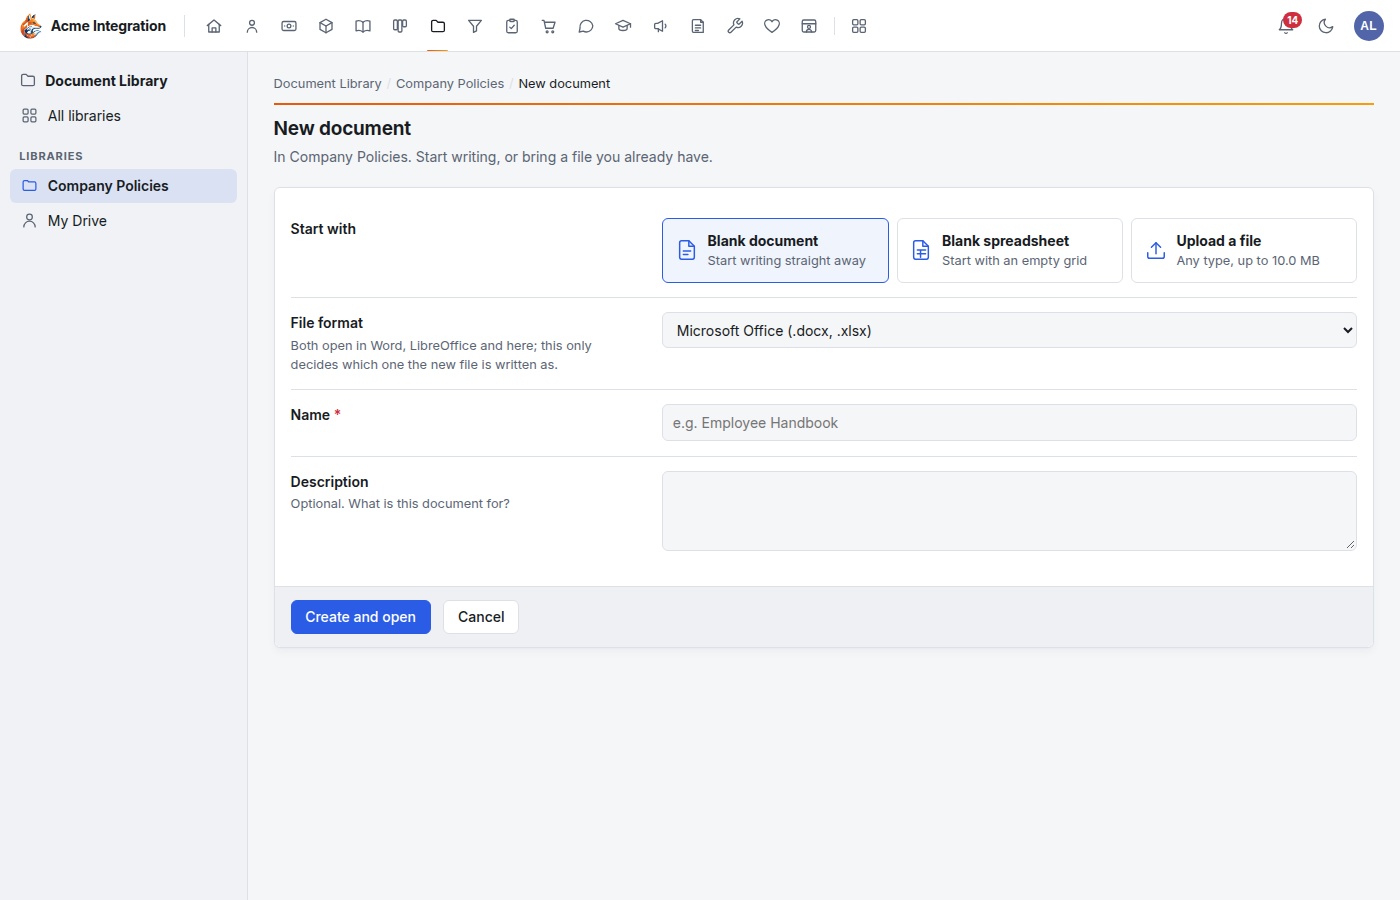
- In the library (or a folder), click Create.
- Under Start with, choose Blank document, Blank spreadsheet or Upload a file.
- For a blank file, pick the File format: Microsoft Office (.docx, .xlsx) or OpenDocument (.odt, .ods). Both open in Word, LibreOffice and here.
- Enter a Name and an optional Description.
- Click Create and open. The editor opens.
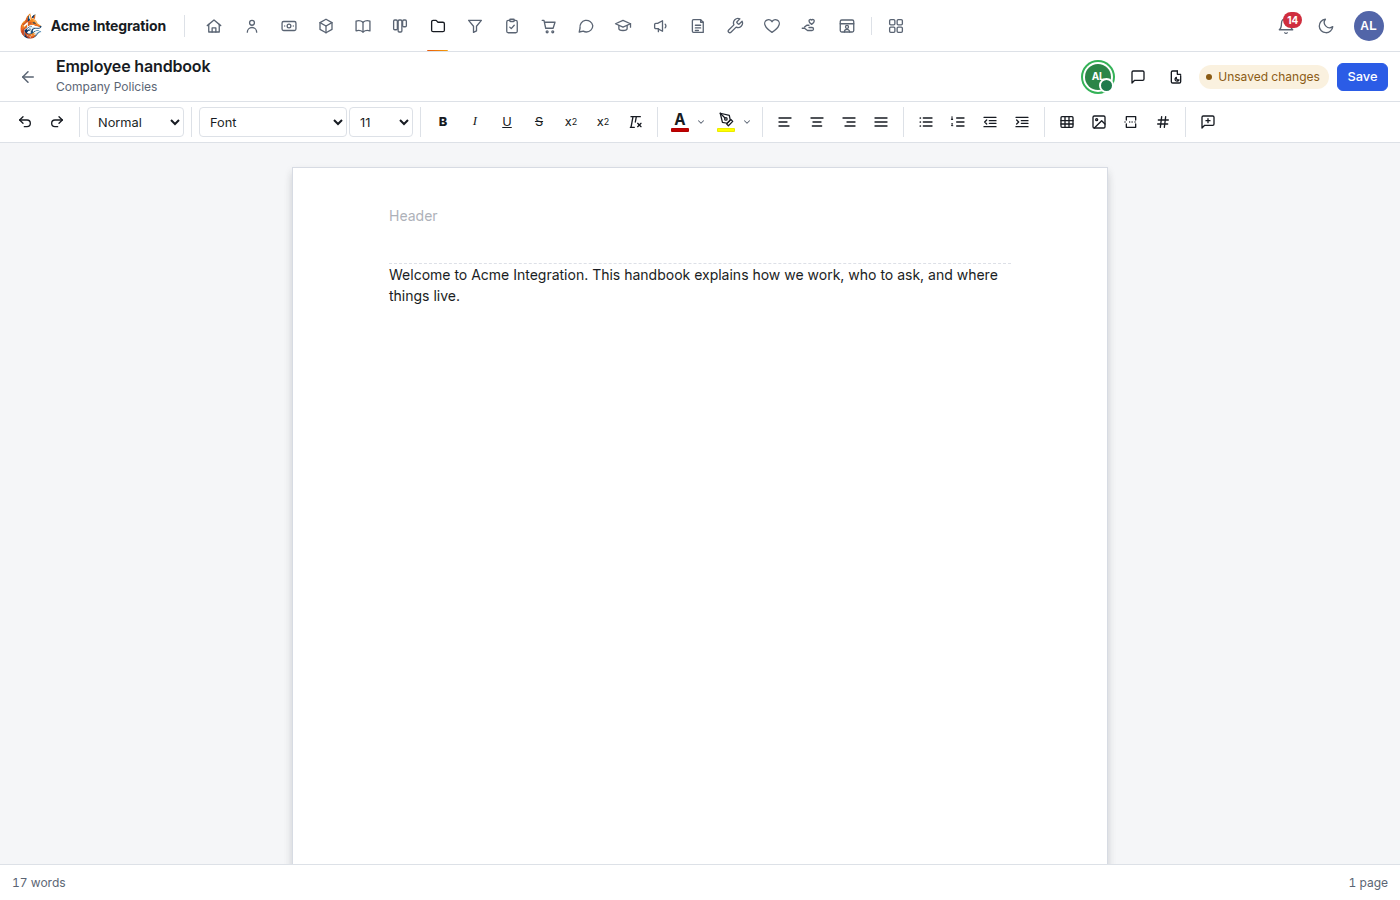
- Write, then click Save (top right). The badge says Unsaved changes until you do, then All changes saved.
To edit an existing .docx or .xlsx later, open it and click
Edit.
Work with a file
Click a file's name to open its page.
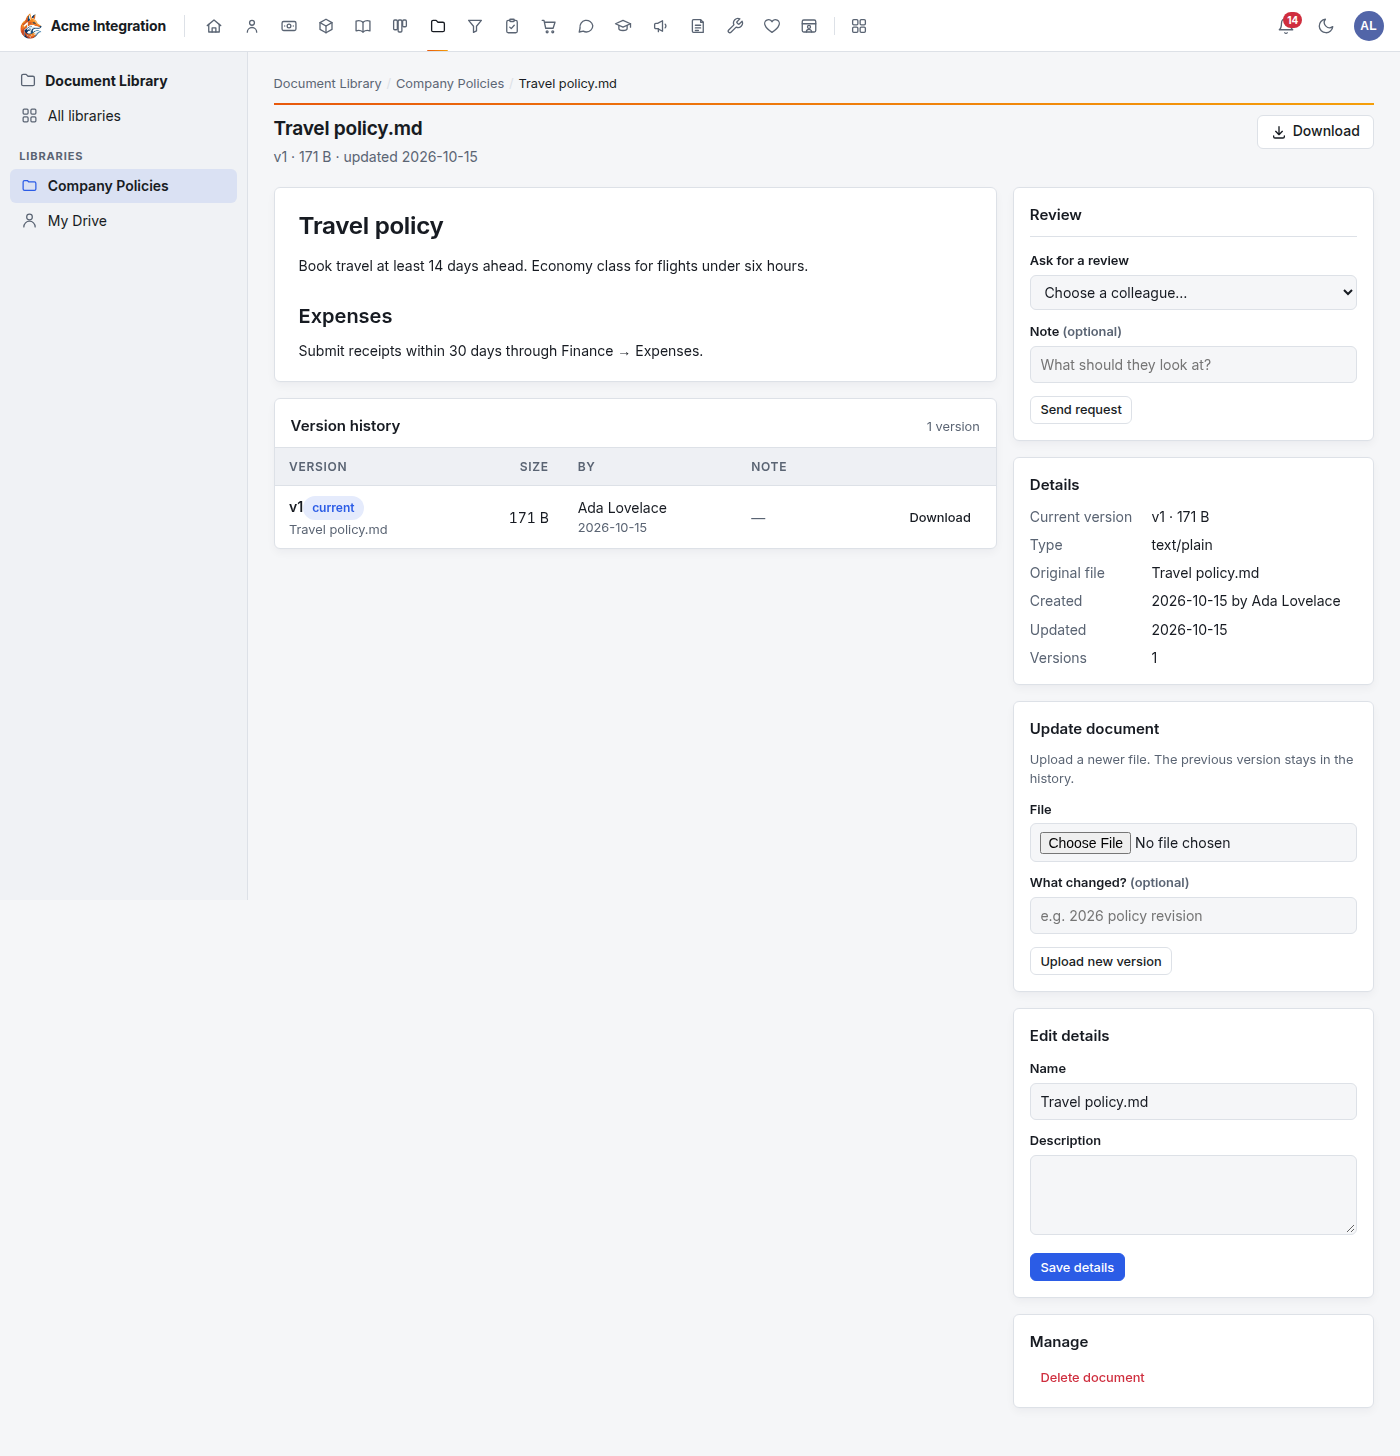
- Download (top right) gets the current version.
- Version history lists every version with who uploaded it and its note. Download any one, Restore an older one, or Compare it with the current one.
- Update document: choose a newer File, say What changed?, and click Upload new version.
- Review: under Ask for a review, choose a colleague, add a Note, and click Send request. The reviewer sees the request on the document and answers with Approve or Request changes. You can Withdraw a request.
- Edit details: change the Name and Description, then Save details.
- Tags: add the library's tags to group documents. Manage tags (on the library page) creates, renames, recolors and deletes them.
- Manage → Delete document sends it to the recycle bin.
On the library page, the icons at the end of each row Download, Rename, Move to folder and Delete.
The recycle bin
Deleted items go to the library's Recycle bin (link under the file list). Click Restore to bring one back. Only library administrators can Delete forever.
My Drive
My Drive is your personal space. Files there are yours alone until you share them. It works like any other library.
Share a library (library administrators)
- Open the library and click the gear (Library settings).
- Under Access → Visibility, choose Organization (everyone can read; the owning unit writes) or Private, and click Save visibility.
- Under Shared with, choose a Person or unit and Access (read or read + write), and click Grant access. A person you grant access to is told.
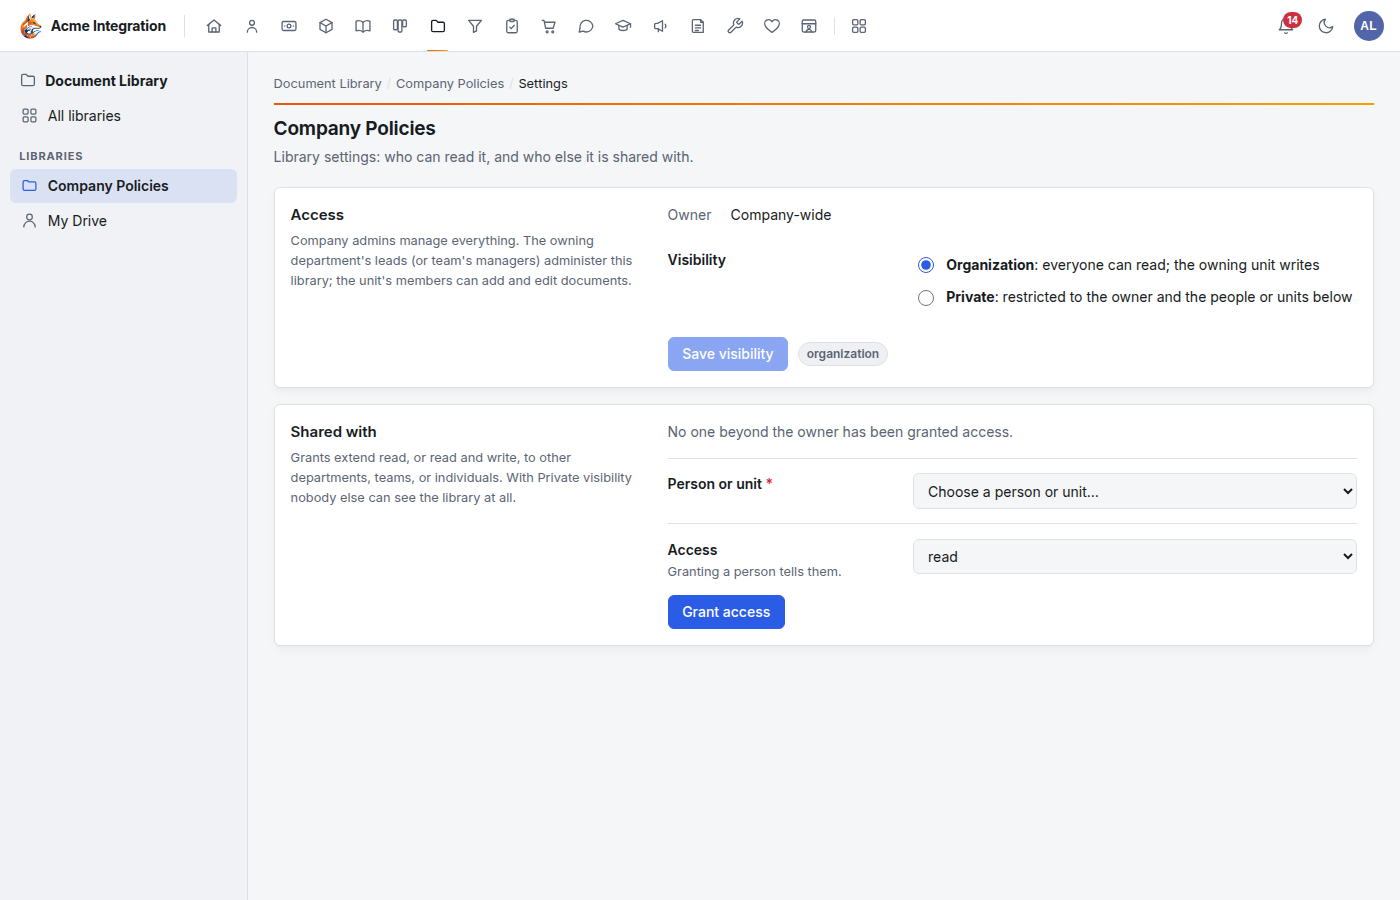
People who open a private library they can't read see Request access. Clicking it notifies the library's administrators, who grant access here.
Link files from the Knowledge Base
A Knowledge Base page can link to library documents (the Documents panel on the page), so a document lives in one place and pages point to it. See Knowledge Base.
Troubleshooting
I can't see a library. It is Private and not shared with you. Open its link and click Request access, or ask its administrators.
There is no Upload, New folder or Create button. You have read access only. Ask for read + write.
There is no New library button. Only company administrators, department leads and team managers create libraries ("You can't create libraries").
An upload fails. The file is over the size limit shown on the upload area.
My edits disappeared. The editor does not save as you type: it keeps changes when you click Save. It warns you if you try to leave with Unsaved changes; don't dismiss that warning without saving.
I can't empty the recycle bin. Only library administrators can delete items permanently.