 foxxcyber/docs
Start here: what Foxx HQ is
What Foxx HQ does, every area in one table, how business and nonprofit organizations differ, and a first-day checklist for a new administrator.
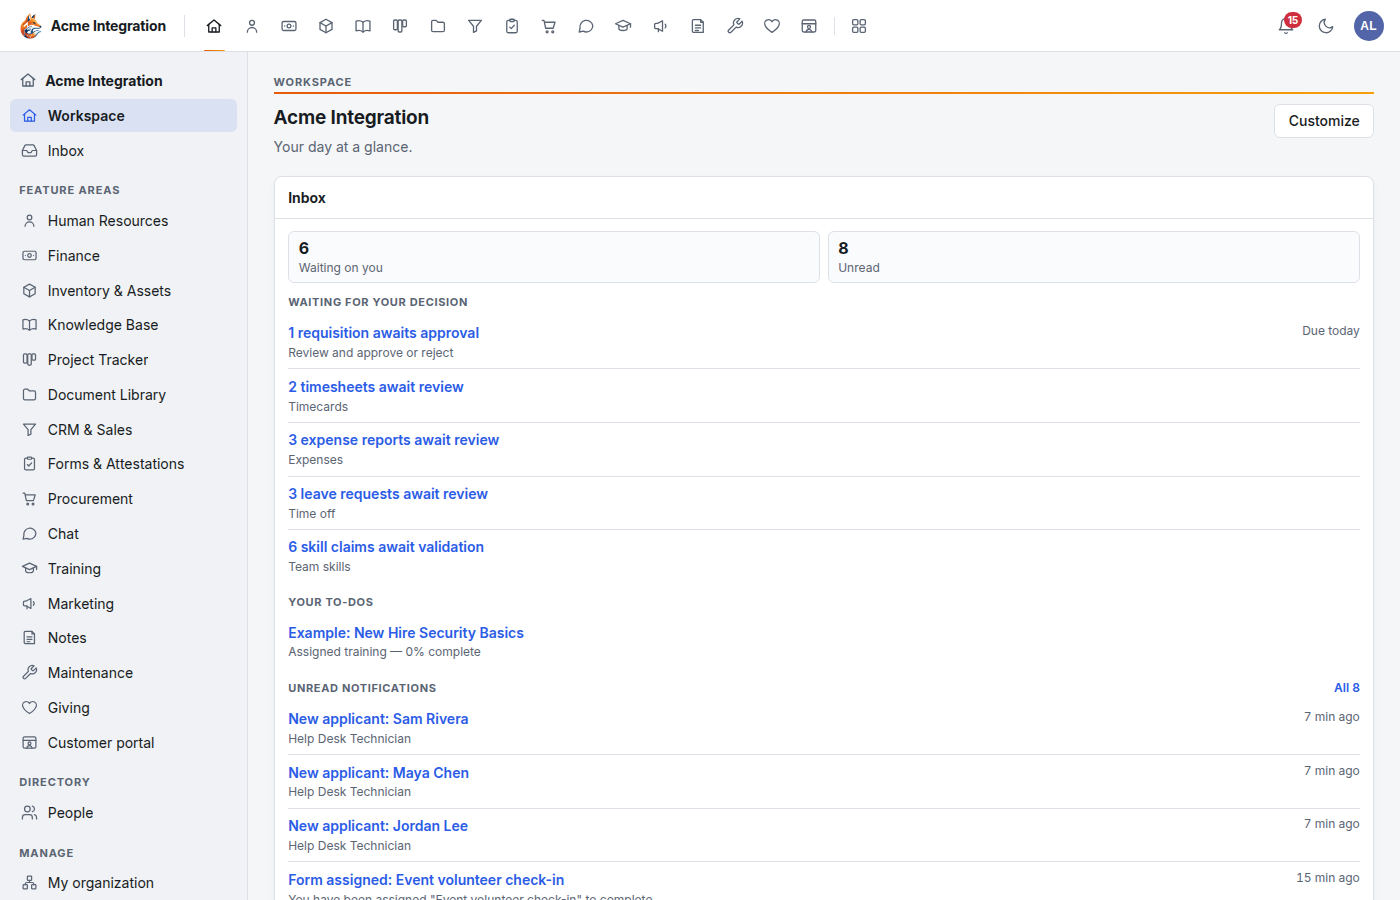
Foxx HQ is the back office for a small business or nonprofit, in one place: people and HR, finance and purchasing, customers and donors, projects, documents and chat. Everyone in your organization signs in to the same workspace. What each person sees depends on the departments they belong to and the areas turned on for them.
If you set up Foxx HQ for your organization, read this page first, then work through the first-day checklist below.
The three things that decide what you see
Almost every "why can't I see this?" question comes down to three things:
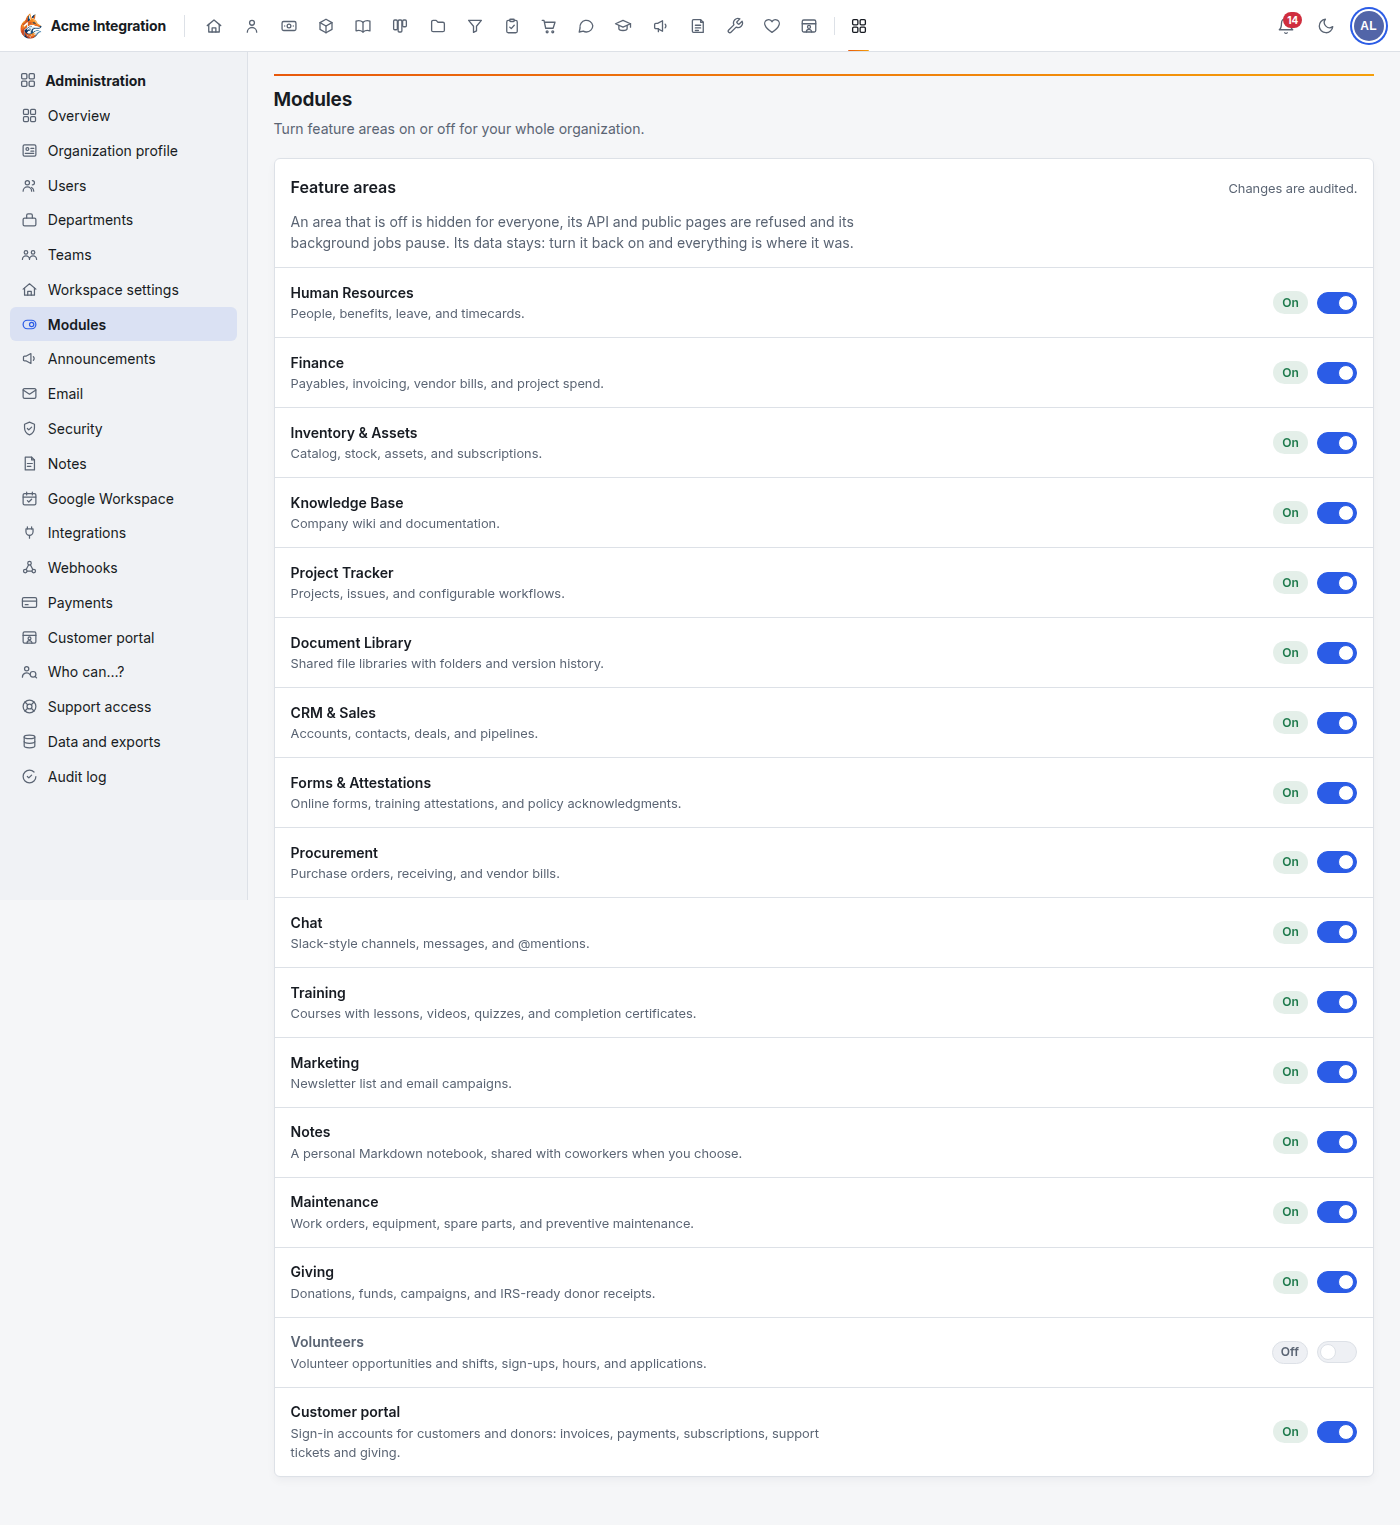
- Is the area turned on for the organization? A company administrator turns areas on and off under Administration → Modules. An area that is off is hidden from everyone.
- Which departments are you in? Some areas (Finance, Inventory & Assets, CRM & Sales, Marketing) only appear for people in a department that has the area enabled under Administration → Departments → the department → Feature areas. A department called "Finance" does not switch on Finance by itself.
- What is your role? In each department you are a member or a lead. Company administrators can do everything. Someone can also be given an area's admin grant to run one area for the whole company.
The full rules are in Access and permissions.
Every area at a glance
The table lists each area as it appears in the app, who can use it once it is on, and where it is documented.
| Area | What it is for | Who can use it | Guide |
|---|---|---|---|
| Workspace | Your home page: widgets showing what needs you | Everyone | Workspace home |
| Inbox | Everything waiting on you, and your notifications | Everyone | Inbox and notifications |
| Human Resources | People, benefits, leave and timecards | Everyone (their own records); HR runs the rest | HR overview |
| Finance | Invoicing, payables, vendor bills, the ledger | Departments with Finance enabled | Finance overview |
| Inventory & Assets | Catalog, stock, assets and subscriptions | Departments with Inventory enabled | Inventory and assets |
| Knowledge Base | Your company wiki | Everyone | Knowledge Base |
| Project Tracker | Projects, issues, boards and workflows | Everyone | Project Tracker |
| Document Library | Shared file libraries and a personal drive | Everyone | Document Library |
| CRM & Sales | Accounts, contacts, deals and pipelines | Departments with CRM enabled | CRM |
| Forms & Attestations | Online forms, training attestations, policy sign-offs | Everyone | Forms |
| Procurement | Requisitions, purchase orders, receiving | Everyone (requisitions) | Procurement |
| Chat | Channels, messages and @mentions | Everyone | Chat |
| Training | Courses with lessons, quizzes and certificates | Everyone | Training |
| Marketing | Newsletter list and email campaigns | Departments with Marketing enabled | Marketing and newsletters |
| Notes | A personal Markdown notebook you can share | Everyone | Notes |
| Maintenance | Work orders, equipment, spare parts, preventive maintenance | Everyone can request help; departments with Maintenance run it | Maintenance |
| Giving | Donations, funds, campaigns and donor receipts | Nonprofits only; company administrators and people with a Giving grant | Giving setup checklist |
| Volunteers | Volunteer shifts, sign-ups, hours and applications | Everyone can sign up; leads of a department with Volunteers coordinate | Volunteers |
| Customer portal | Sign-in pages for your customers and donors | Company administrators set it up | Customer portal |
| Administration | Users, departments, modules, email, payments, security | Company administrators | Administration console |
Some areas start switched off
Volunteers and Customer portal are off for every new organization, and Giving is off until a nonprofit turns it on. Turn them on under Administration → Modules when you are ready. See Modules.
Business or nonprofit
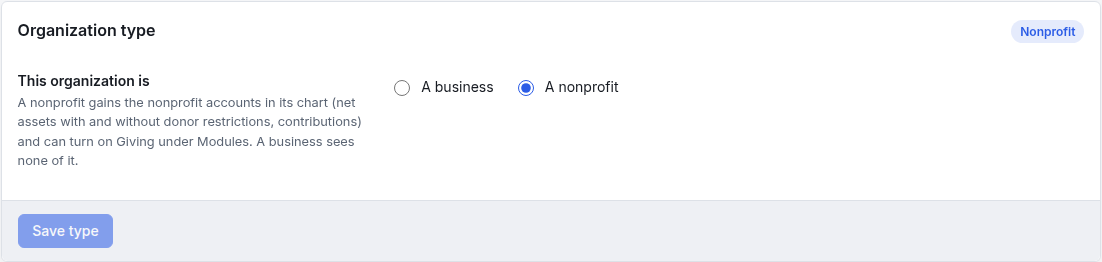
Every organization is either a business or a nonprofit. A company administrator sets this under Administration → Workspace settings → Organization type.
| A business | A nonprofit | |
|---|---|---|
| Giving (donations, funds, donor receipts) | Not offered: it does not appear under Modules | Offered under Modules, off until you turn it on |
| Chart of accounts | Business accounts only | Adds the nonprofit accounts: net assets with and without donor restrictions, and contributions |
| Everything else | The same | The same |
If you are a nonprofit and plan to take donations, set the type first, then follow the Giving setup checklist. For more on this setting, see Organization and branding.
First-day checklist for a new administrator
Work through these in order. Each step links to the page with the full instructions.
- Sign in and protect your own account. Change your temporary password and set up two-factor authentication under My account. See Your account.
- Set the organization type. Administration → Workspace settings → Organization type: a business or a nonprofit. See Business or nonprofit above.
- Fill in the organization profile and branding. Name, logo, colors and the welcome message people see on their workspace. See Organization and branding.
- Choose which areas you use. Administration → Modules: turn off what you will not use, and turn on Volunteers, Customer portal or Giving if you need them. See Modules.
- Create departments and enable their areas. Administration → Departments. Remember that Finance, Inventory & Assets, CRM & Sales and Marketing only appear for departments that have them enabled under Feature areas. See Users, departments and teams.
- Add your people and put each one in a department, as a member or lead. Foxx HQ does not email staff an invitation: you give each person their email and temporary password.
- Set up email so notifications, receipts and campaigns can go out. See Email.
- Decide your security rules, such as requiring two-factor authentication for everyone. See Security.
- Connect payments if you will take card payments or donations (Stripe or PayPal). See Payments setup.
- Arrange the default workspace that new people start with, and pin anything everyone must see. See Workspace home.
Not sure why someone can or can't do something? Administration → Who can…? answers "who can do X?" for any person and area.
Getting help inside the app
Open the avatar menu (your initials, top right) and choose Help & guides for the in-app guides. Every area also has a short guide there.
Troubleshooting
An area I expect is missing from the top bar and the sidebar. Check, in this order:
- Administration → Modules: is the area on?
- For Finance, Inventory & Assets, CRM & Sales and Marketing: are you in a department that has the area enabled under Feature areas?
- For Giving: is the organization a nonprofit, and do you have a Giving grant (or are you a company administrator)?
A page says "There is nothing at this address". The area behind that link is switched off for your organization, or you followed an old link. Use Back to the workspace and check Modules.
I don't see Administration. Only company administrators see it. Ask an existing administrator to tick Company administrator on your user.