 foxxcyber/docs
E-signatures
Send PDFs and Word documents to anyone for signature, follow who has signed, and keep the sealed signed copies with a certificate of completion.
E-signatures sends documents to people inside or outside your organization for signature. Signers need no account: they open a link from their email, confirm it's them with a code, and sign in their browser on a computer or a phone. When everyone has signed, Foxx HQ stamps the signatures onto the documents, seals them, makes a certificate of completion, emails everyone their copies and files them in your Document Library.
Before you start
- E-signatures must be on under Administration → Modules. Everyone in the organization can then send documents for signature and sees their own envelopes. Company administrators can also see everyone's (Everyone's on the list).
- Email must be set up (Administration → Email): signers get their links and codes by email, so Foxx HQ won't send an envelope until it can email.
Send documents for signature
An envelope is what you send: one or more documents, the people who sign them in order, and where each person signs.
- Open E-signatures and click New envelope. Give it a Subject (it becomes the email's subject) and, if you like, a Message for the signers. Click Create.
- Under Documents, click Add PDF or Word document. Word files (.docx) are turned into PDF. A document can be up to 25 MB and 300 pages. Password-protected PDFs can't be used: remove the password first.
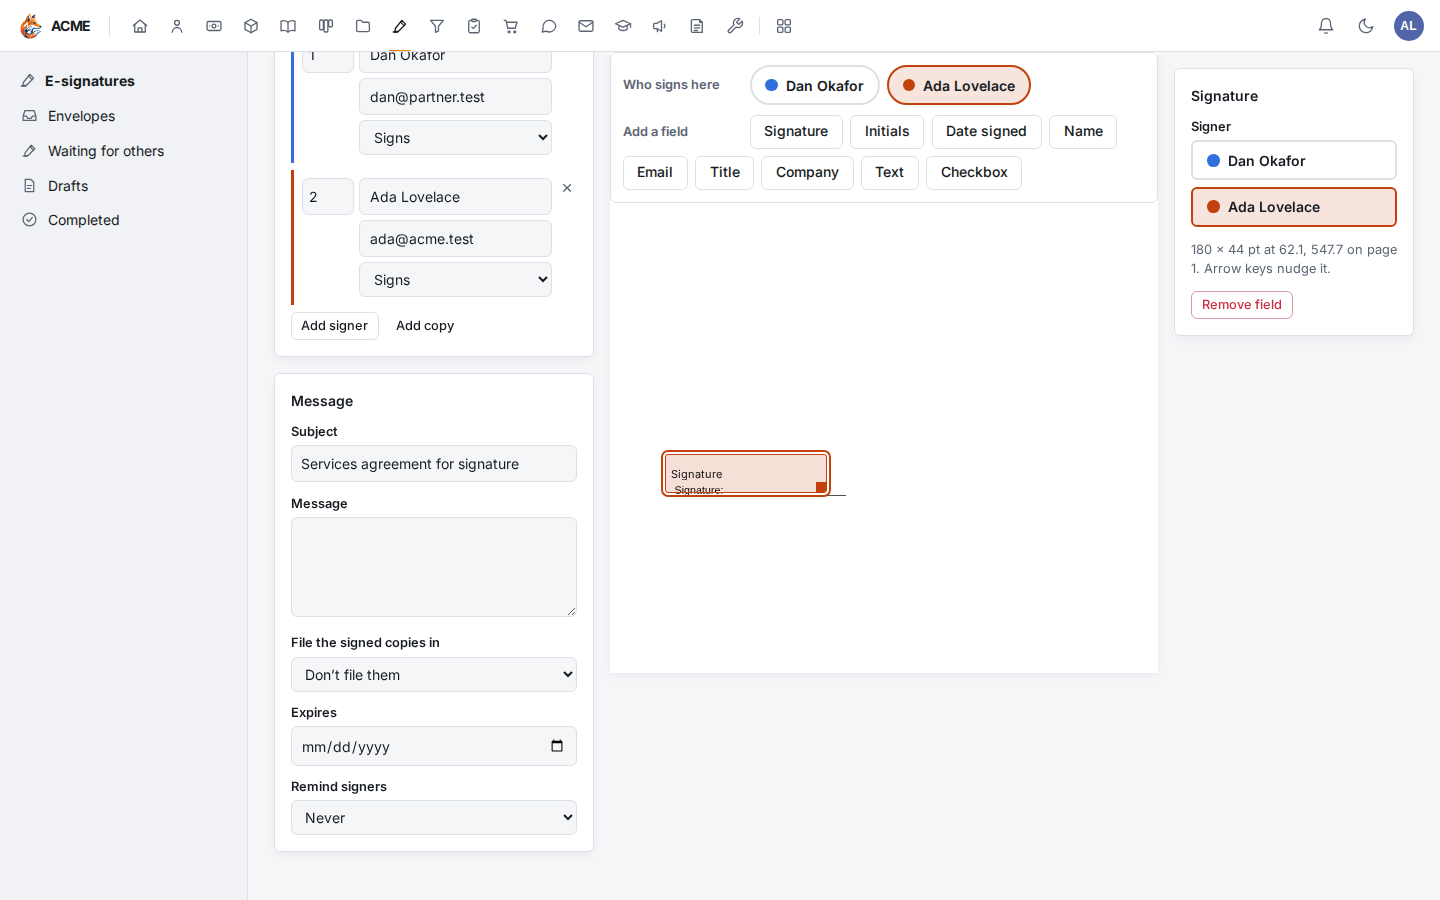
- Under Recipients, click Add signer for each person who signs, with their name and email. The number on the left is the signing order: signer 1 gets the email first, signer 2 once signer 1 has signed, and so on. Give two people the same number to let them sign at the same time. Click Add copy for someone who only gets the signed documents.
- Place the fields. Above the pages, click the signer under Who signs
here (each signer has their own colour), click a field under Add
a field (Signature, Initials, Date signed, Name,
Email, Title, Company, Text or Checkbox), then
click the page where it goes.
- Drag a field to move it, or drag its corner to resize it. The arrow keys nudge the selected field (hold Shift for bigger steps); Delete removes it.
- Select a field to give it to another signer (click their name in the panel on the right), give a text field or checkbox a Label, or make it optional.
- Date signed, Name and Email are filled in by Foxx HQ when the person signs.
- Under Message, choose where the signed copies are filed (File the signed copies in: any library you can add files to), an Expires date if the envelope should stop working after a day, and Remind signers (every day, every 2 or 3 days, or every week) to have Foxx HQ email anyone who hasn't signed yet a reminder with a fresh link until they sign or the envelope expires.
- Click Send. Every change saves as you go; if something is missing (a document, a signer, or a signature field for each signer), Foxx HQ lists it above the pages and Send stays off.
Once an envelope is sent its documents and fields can't change. You can still fix who it goes to and when it stops (see Correct a name or email and Change the expiry date or automatic reminders); for anything else, Void it and send a new one.
From an email
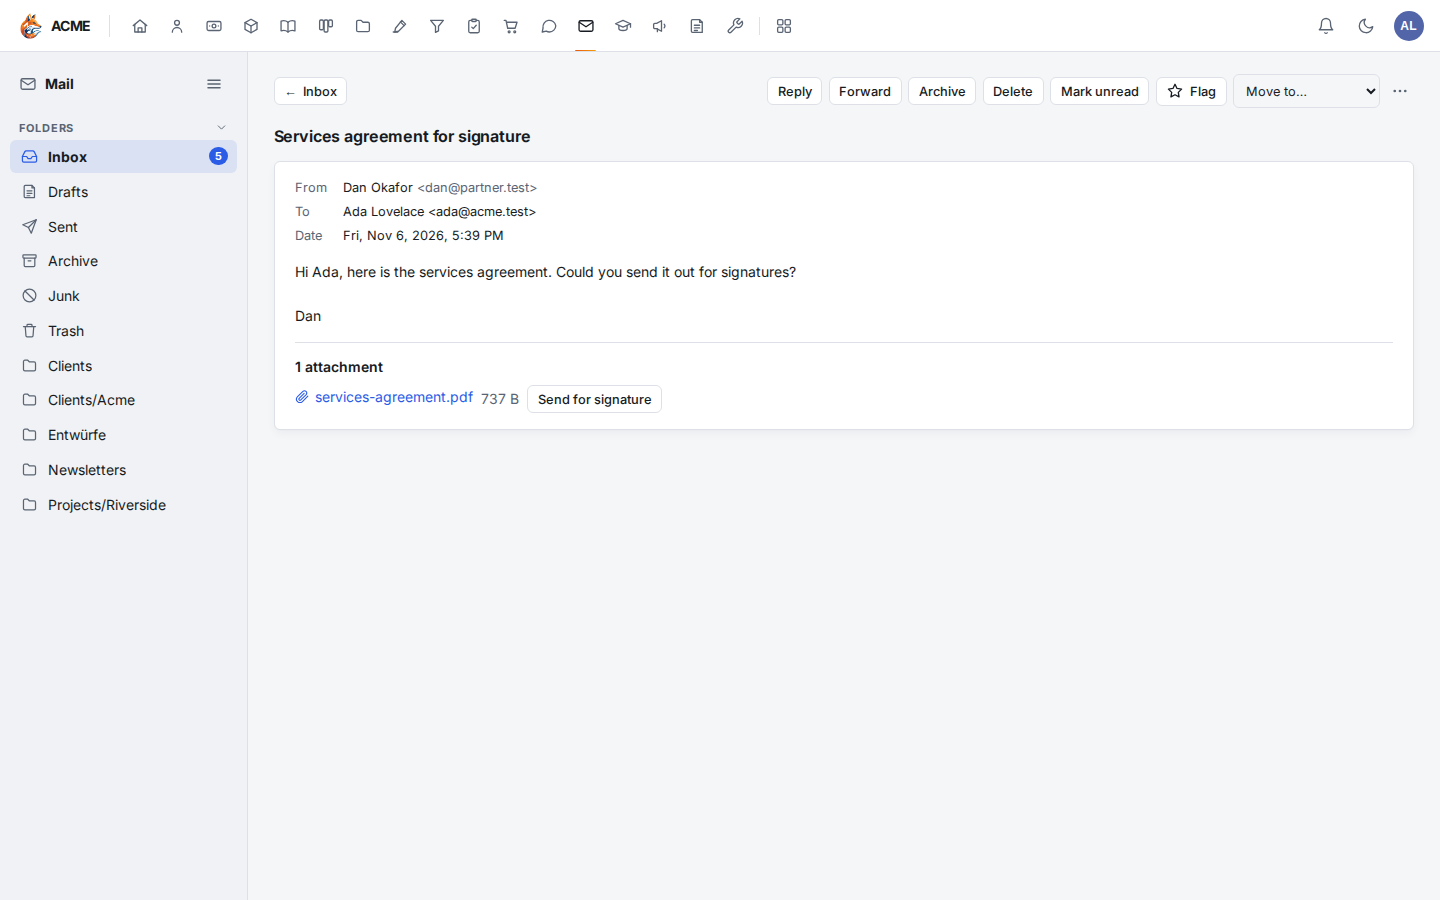
A PDF or Word file someone emailed you can go straight out for signature:
- Open the message in Mail.
- Click Send for signature beside the attachment. Foxx HQ starts an envelope named after the message, with the file as its document, and opens it.
- Add the signers and place the fields as in steps 3 to 6 above, then click Send.
Templates
A template saves an envelope you send often (an NDA, a services agreement) with its documents, its fields and its message, so next time you only enter the people.
Save an envelope as a template
- Prepare the envelope as in Send documents for signature: its documents, its recipients and every field.
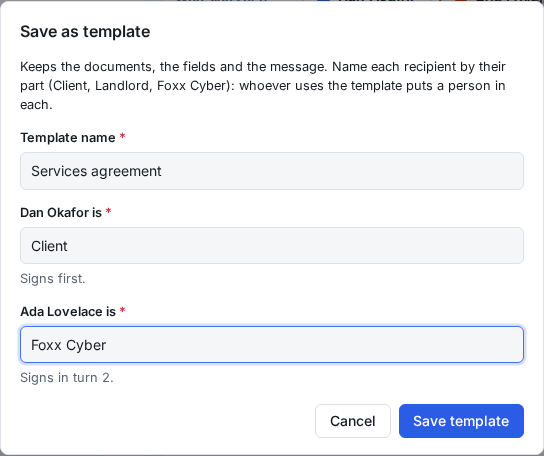
- Click Save as template at the top of the editor.
- Give the template a name.
- Name each recipient by their part, such as Client, Landlord or Foxx Cyber. Signers start as Signer 1, Signer 2, and copies as Copy. The part names are what the next sender fills in.
- Click Save template.
The template keeps the documents, the fields placed for each part, the message, the reminders and where the signed copies are filed. The envelope you started from stays a draft: send it or delete it.
Send from a template
- Open E-signatures → Templates.
- Click Use beside the template.
- Enter a name and email for each part.
- Click Create envelope. The new draft opens with the documents and every field already in place.
- Check it and click Send.
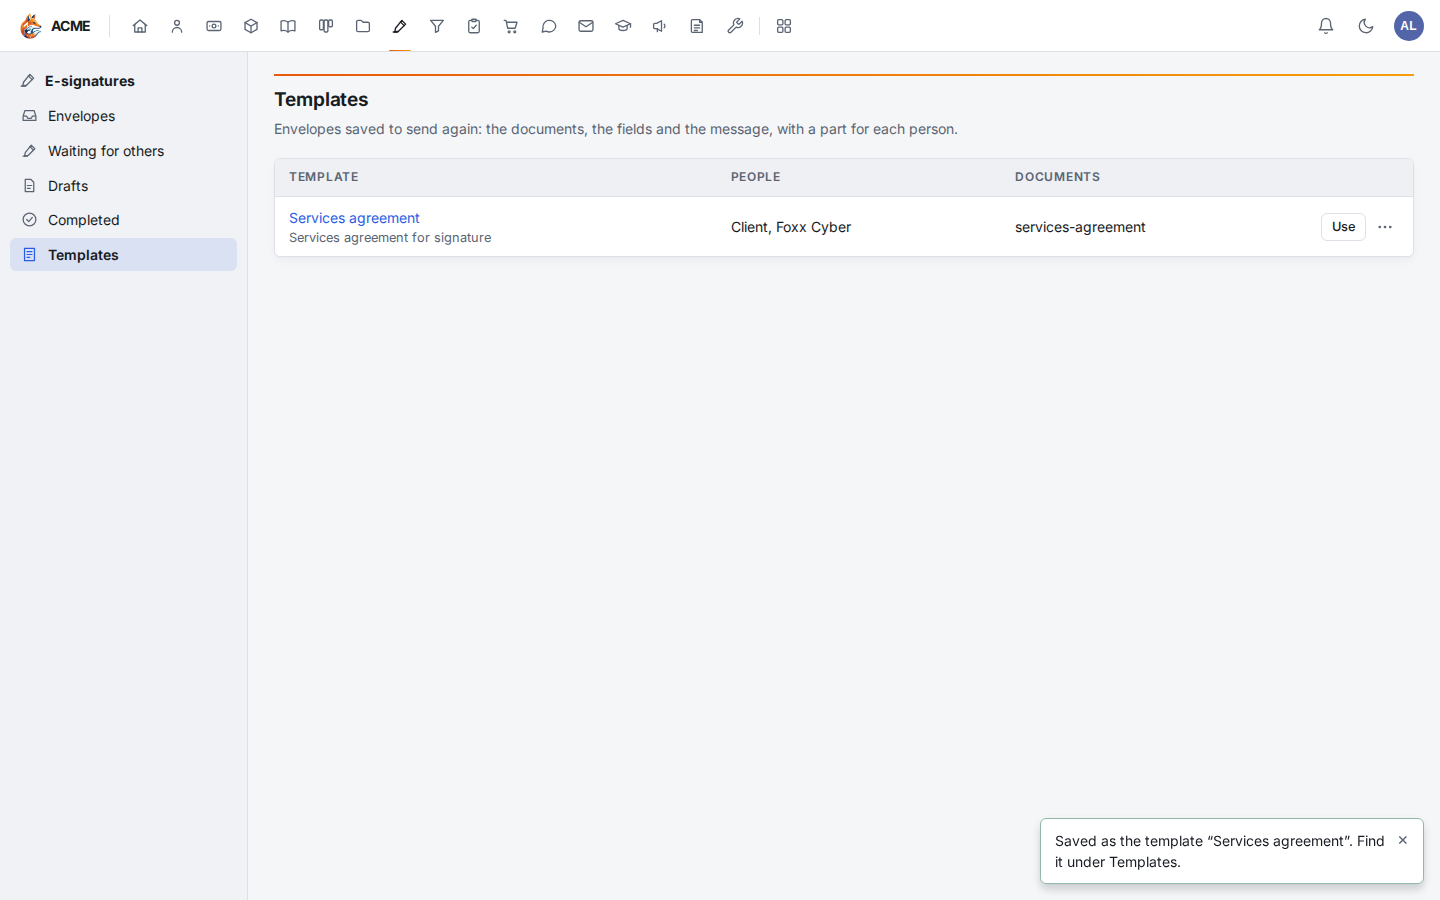
Everyone who sends envelopes can use every template. To delete one, click ⋯ → Delete template beside it. Only the person who made it, or an e-signatures administrator, can delete it. Envelopes already made from it are not affected.
What the signer sees
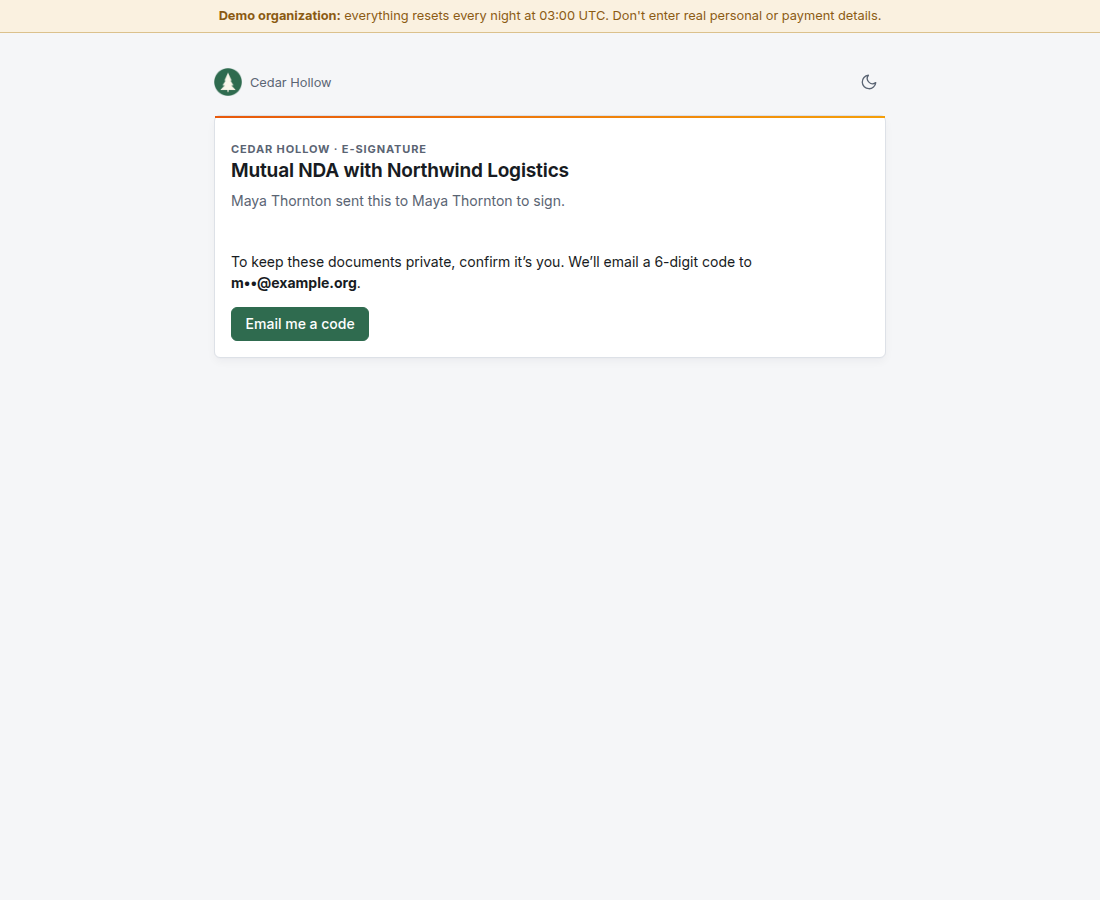
- The email's link opens a page with the subject and who sent it. Nothing else is shown until the signer clicks Email me a code and enters the 6-digit code from the email. The code works for 10 minutes; the page only trusts the browser that entered it, so a forwarded email isn't enough to sign.
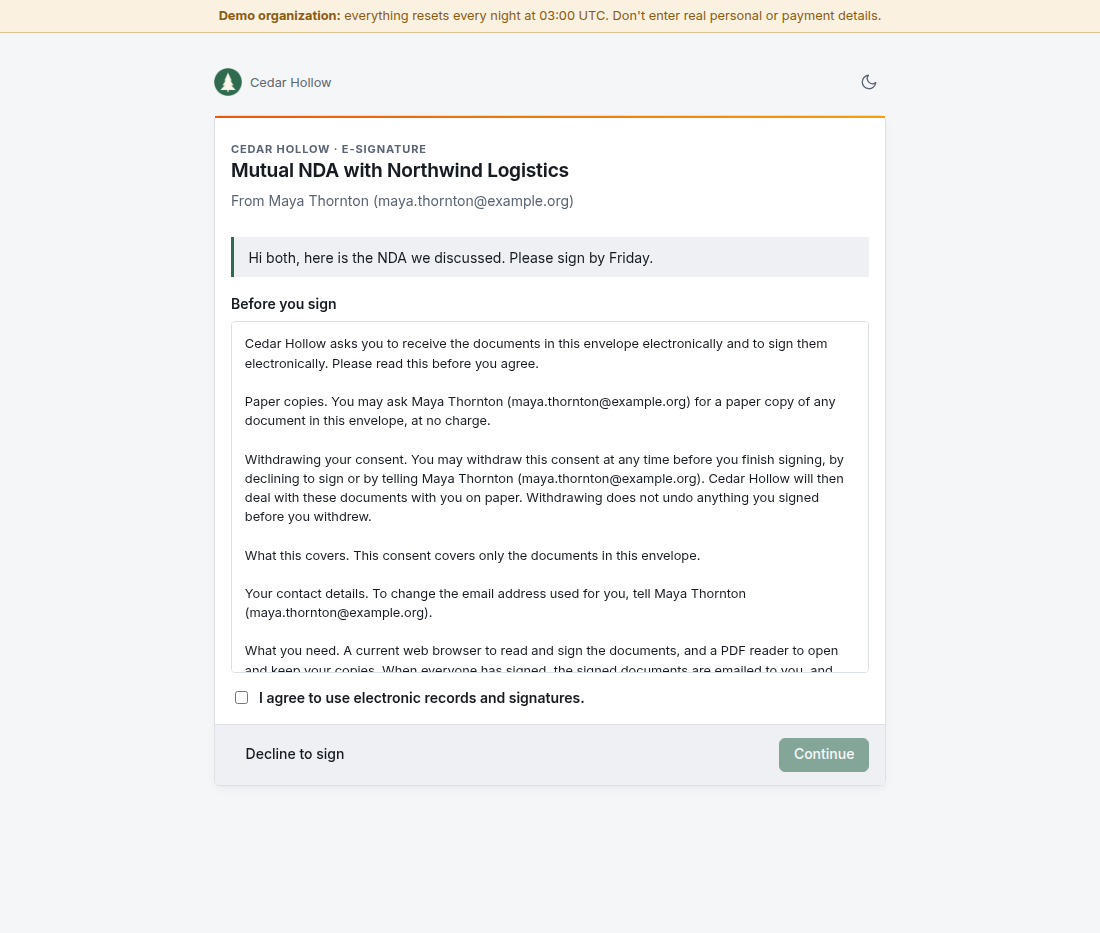
- They read Before you sign: what signing electronically means for them, how to get a paper copy and how to withdraw. They tick I agree to use electronic records and signatures and click Continue. (This is the consumer disclosure and consent the U.S. ESIGN Act asks for, 15 U.S.C. § 7001(c).)
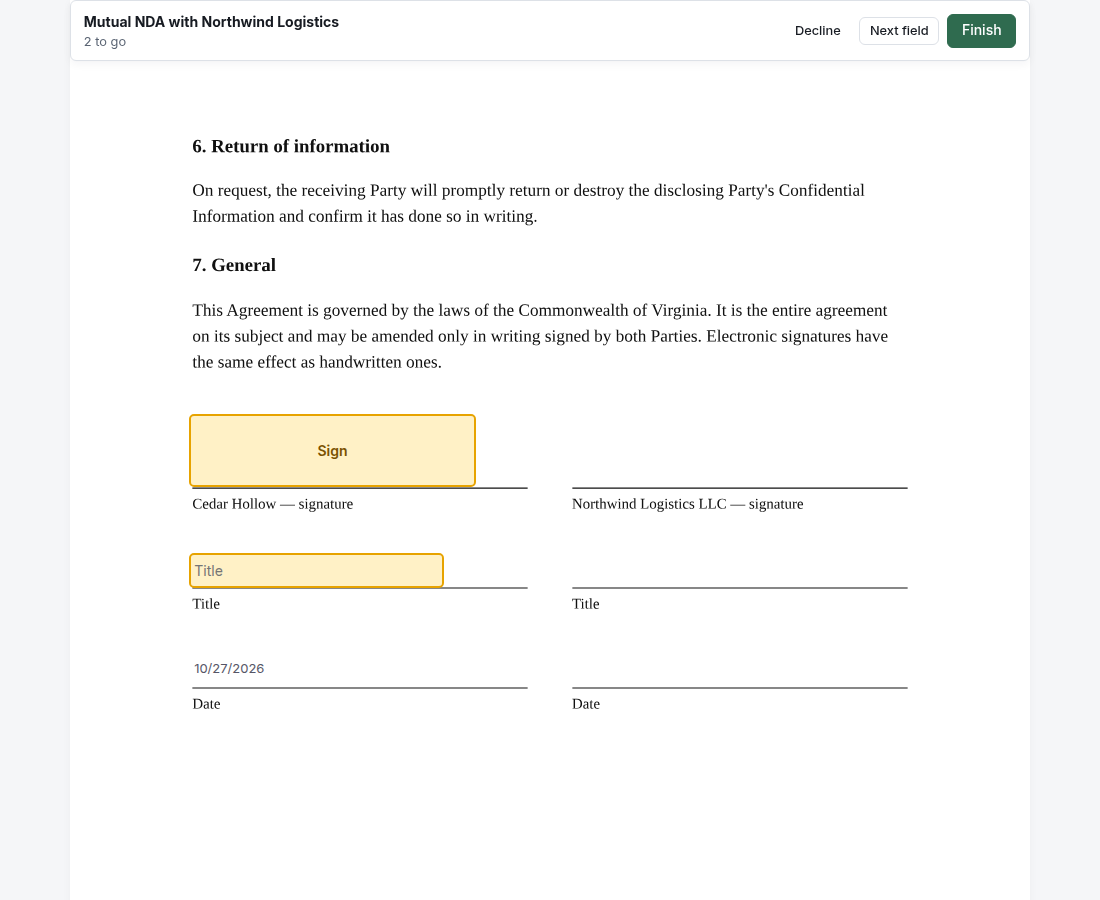
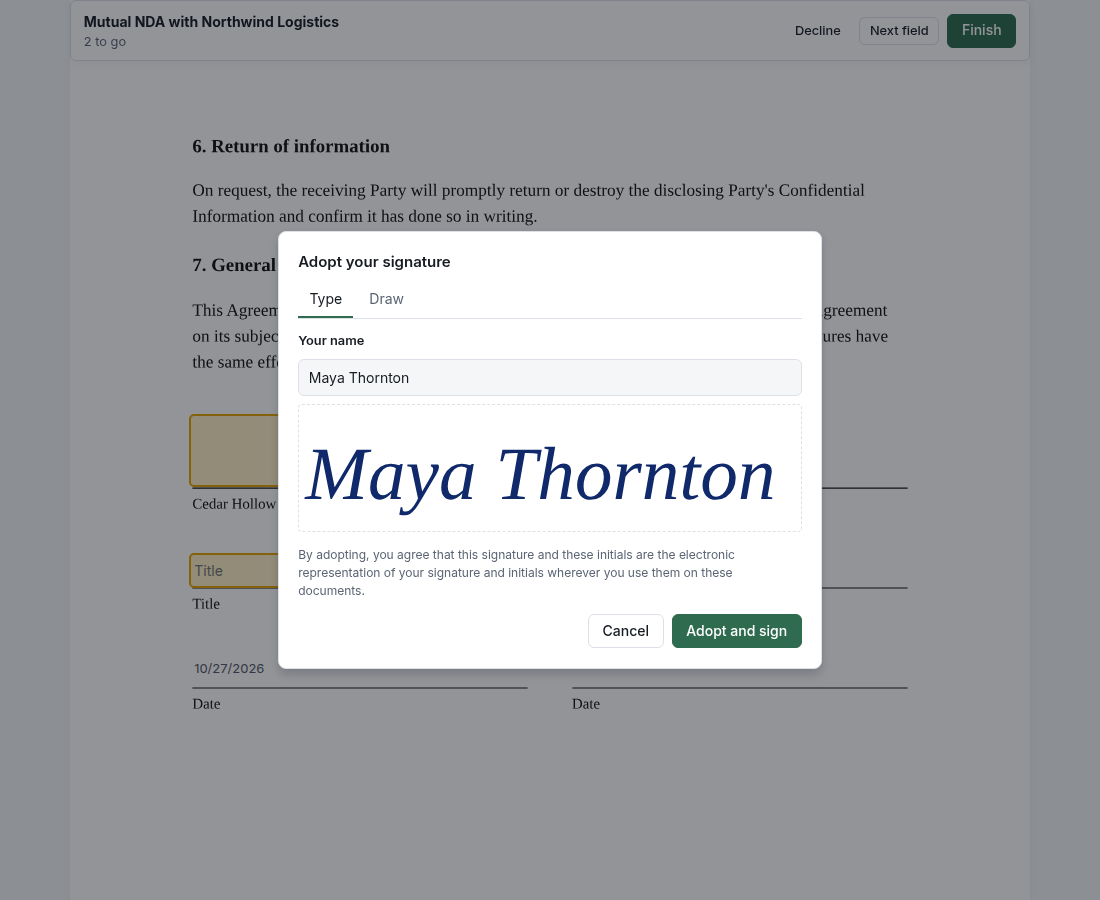
- They go through the documents. Yellow boxes are theirs to fill. The first Sign asks them to adopt a signature: typed (Foxx HQ draws it in a script face) or drawn with a finger, pen or mouse; initials are typed. Each Sign or Initial box then signs with one click. Next field jumps to the next box still to fill.
- They click Finish. Or Decline, with a reason, which ends the envelope for everyone and tells you.
Follow an envelope
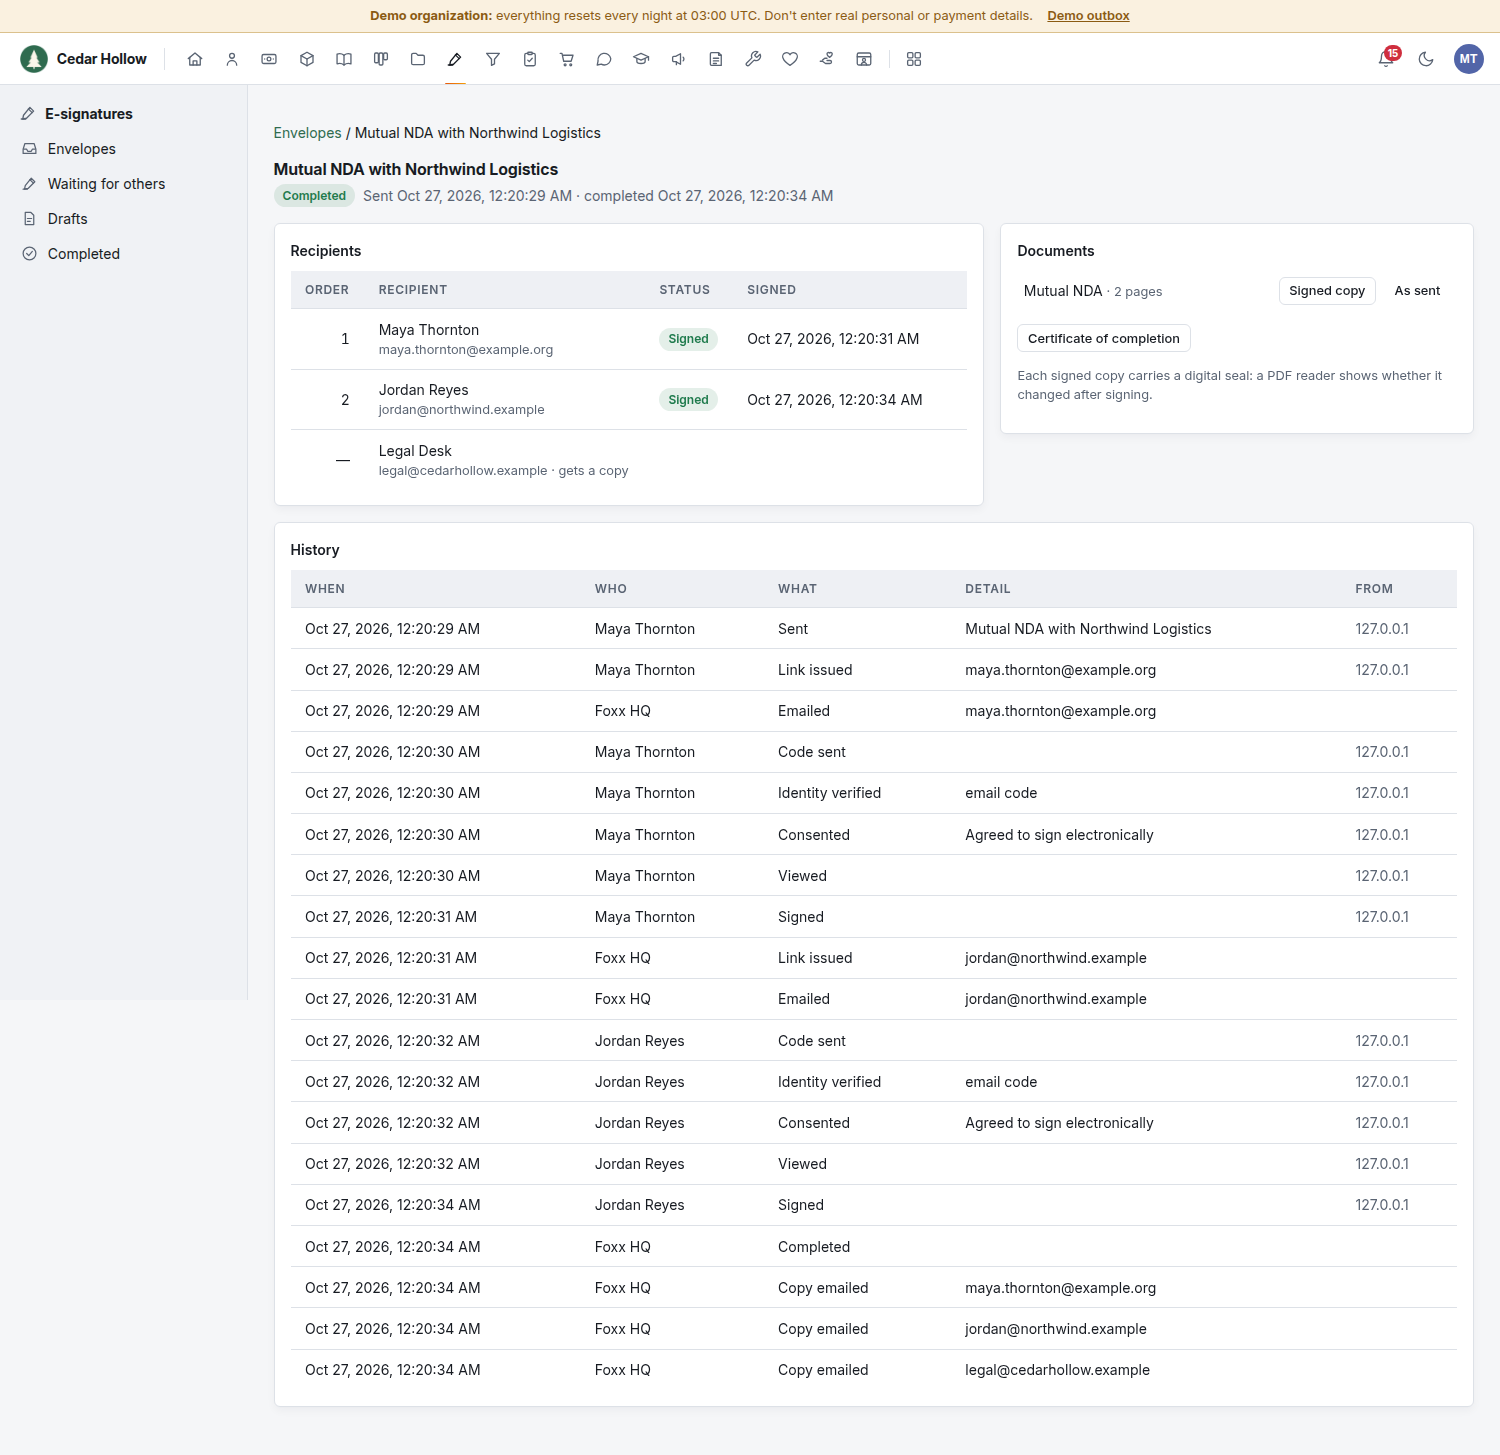
Waiting for others lists what is out for signature, with who it is waiting for. Open an envelope to see:
- Recipients: each signer's status (Sent, Viewed, Signed or Declined) and when they signed. The ⋯ beside a person who hasn't signed yet has the actions below.
- Documents: the documents as sent and, once complete, the Signed copy of each and the Certificate of completion.
- History: every step with its time and the address it came from: sent, emailed, code sent, identity verified, consented, viewed, signed, corrected, rescheduled, declined, voided, completed, copies emailed. The history can't be edited or deleted.
The top of a sent envelope shows when it expires and how often it reminds signers.
Remind a signer
Click ⋯ beside the signer whose turn it is and choose Send a reminder, then Send reminder. They get a new email with a fresh link; the old link stops working. To remind everyone automatically, set Remind signers (below).
Change the expiry date or automatic reminders
- Click Expiry and reminders at the top of the envelope.
- Pick a new Expires date, or clear it for no expiry. The envelope stops working at the end of that day.
- Choose how often to Remind signers: never, every day, every 2 or 3 days, or every week.
- Click Save.
Correct a name or email
For anyone who hasn't signed yet, including later signers and people who get a copy:
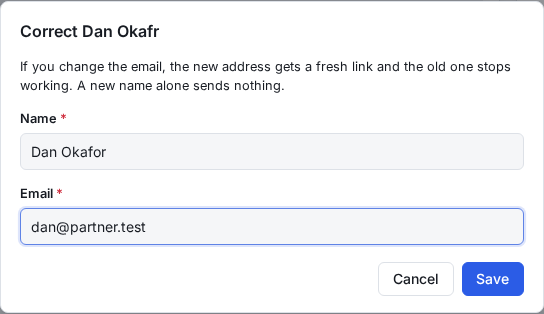
- Click ⋯ beside the person and choose Correct name or email.
- Fix the Name or Email and click Save.
If you changed the email, the new address gets a fresh link at once, the old link stops working, and the person confirms who they are again. A new name alone sends nothing. Each correction is in the history. Documents and fields can't change once an envelope is sent; to change those, void it and send a new one.
Sign in person
When the signer is with you, they can sign on your computer or tablet instead of from their email:
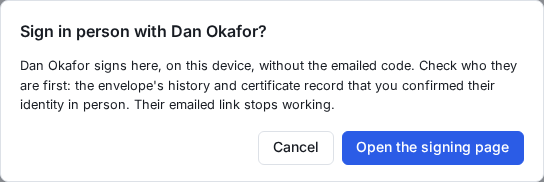
- Check who they are (for example, their ID). There is no emailed code, so the envelope's history and the certificate of completion record that you confirmed their identity in person.
- Open the envelope, click ⋯ beside their name and choose Sign in person on this device.
- Click Open the signing page and hand them the device.
- They agree to sign electronically, sign, and click Finish. Use your browser's back button to return to Foxx HQ.
Only the signer whose turn it is can sign in person. The link in their email stops working.
Void an envelope
To withdraw an envelope that is still out, click Void at the top, give a Reason and click Void. Nobody can sign it any more, and the signers who have a link are told, with your reason.
The signed copies
When the last signer finishes, Foxx HQ:
- stamps each signature, initials, date and entry onto the documents where you placed them, with the envelope number at the top of every page;
- seals each signed PDF with a digital signature. A PDF reader shows that the document hasn't changed since it was signed; it shows the seal's certificate as not yet trusted, because it is your organization's own (one per Foxx HQ workspace), not one bought from a certificate authority;
- makes the certificate of completion: the envelope, each document's fingerprint (SHA-256) before and after signing, each signer's signature, how they were identified, when they agreed and signed and from which address, the disclosure they agreed to, and the history;
- emails the signed documents and the certificate to every signer, every copy recipient and you, and files them in the library you chose.
If something goes wrong while the copies are made, the envelope stays Sent with everyone signed; open it and click Finish the envelope to try again.
Troubleshooting
Send stays off. The list above the pages says what is missing: a document, a signer, or a Signature (or Initials) field for each signer. Email must also be set up under Administration → Email.
A signer says they never got the email. Check the address on the envelope; if it is wrong, use Correct name or email. If it is right, ask them to look in their spam folder, then Send a reminder.
"This signing link isn't valid." A newer email (a reminder or a correction) replaced that link: the signer should use the most recent email.
The signer's code doesn't arrive or doesn't work. Codes go to the signer's email and work for 10 minutes, in the browser that asked for them. They can click send a new code. After too many wrong tries the page asks them to wait a while.
Everyone signed but the envelope still says Sent. Making the signed copies failed; open it and click Finish the envelope.
Not yet
Text-message codes and sending one document to many people at once are not part of E-signatures yet.